
By Rafal Leszko
Cloud Software Engineer
Rafał is a passionate software engineer, trainer, conference speaker, and author of the book, Continuous Delivery with Docker and Jenkins. He specializes in Java development, cloud environments, and continuous delivery. Prior to joining Hazelcast, Rafał worked with a variety of companies and scientific organizations, including Google, CERN, and AGH University of Science and Technology.
View all blogs by the authorApr 24, 2019
How to Use Hazelcast Auto-Discovery with Eureka
 Hazelcast IMDG supports auto-discovery for many different environments. Since we introduced the generic discovery SPI, a lot of plugins were developed so you can use Hazelcast seamlessly on Kubernetes, AWS, Azure, GCP, and more. Should you need a custom plugin, you are also able to create your own.
If your infrastructure is not based on any popular Cloud environment, but you still want to take advantage of the dynamic discovery rather than static IP configuration, you can set up your service registry. One of the more popular choices, especially in the JVM-based microservice world, is Eureka (initially developed by Netflix and now part of Spring Cloud). Eureka follows the client-server model, and you usually set up a server (or a cluster of servers for high availability) and use clients to register and locate services.
Hazelcast can use Eureka for auto-discovery thanks to the Hazelcast Eureka plugin. This blog post presents a step-by-step guide of how to set up your Eureka server and use it for the Hazelcast discovery. As an example, we use a common scenario in which we embed Hazelcast into a Spring Boot web service (which does nothing more than puts and reads values from the Hazelcast cluster). The source code for this example is found here.
1. Eureka Server
To use Eureka discovery, you first need to start the Eureka server. In real life scenarios, you would start multiple instances to provide high availability, but for this example, a single localhost instance is good enough.
The Eureka server is usually implemented as a Spring Boot application; therefore, it’s enough to add the following Maven dependencies.
<dependencies>
    <dependency>
        <groupId>org.springframework.cloud</groupId>
        <artifactId>spring-cloud-starter-netflix-eureka-server</artifactId>
        <version>2.0.6.RELEASE</version>
    </dependency>
</dependencies>

<dependencyManagement>
    <dependencies>
        <dependency>
            <groupId>org.springframework.cloud</groupId>
            <artifactId>spring-cloud-dependencies</artifactId>
            <version>Finchley.SR2</version>
            <type>pom</type>
            <scope>import</scope>
        </dependency>
    </dependencies>
</dependencyManagement>
Then, the Spring Boot Application class responsible for starting the Eureka server looks as follows.
@SpringBootApplication
@EnableEurekaServer
public class Application {
    public static void main(String[] args) {
        SpringApplication.run(Application.class, args);
    }
}
The last thing that is missing is the server bootstrap.yaml configuration.
eureka:
  client:
    registerWithEureka: false
    fetchRegistry: false
server:
  port: 8761
With such configuration, you can start the Eureka server as any other Spring Boot application. If you follow the source code dedicated to this blog post, it’s enough to build the project and start the Eureka server JAR.
mvn clean package
java -jar eureka-server/target/eureka-server-0.1-SNAPSHOT.jar
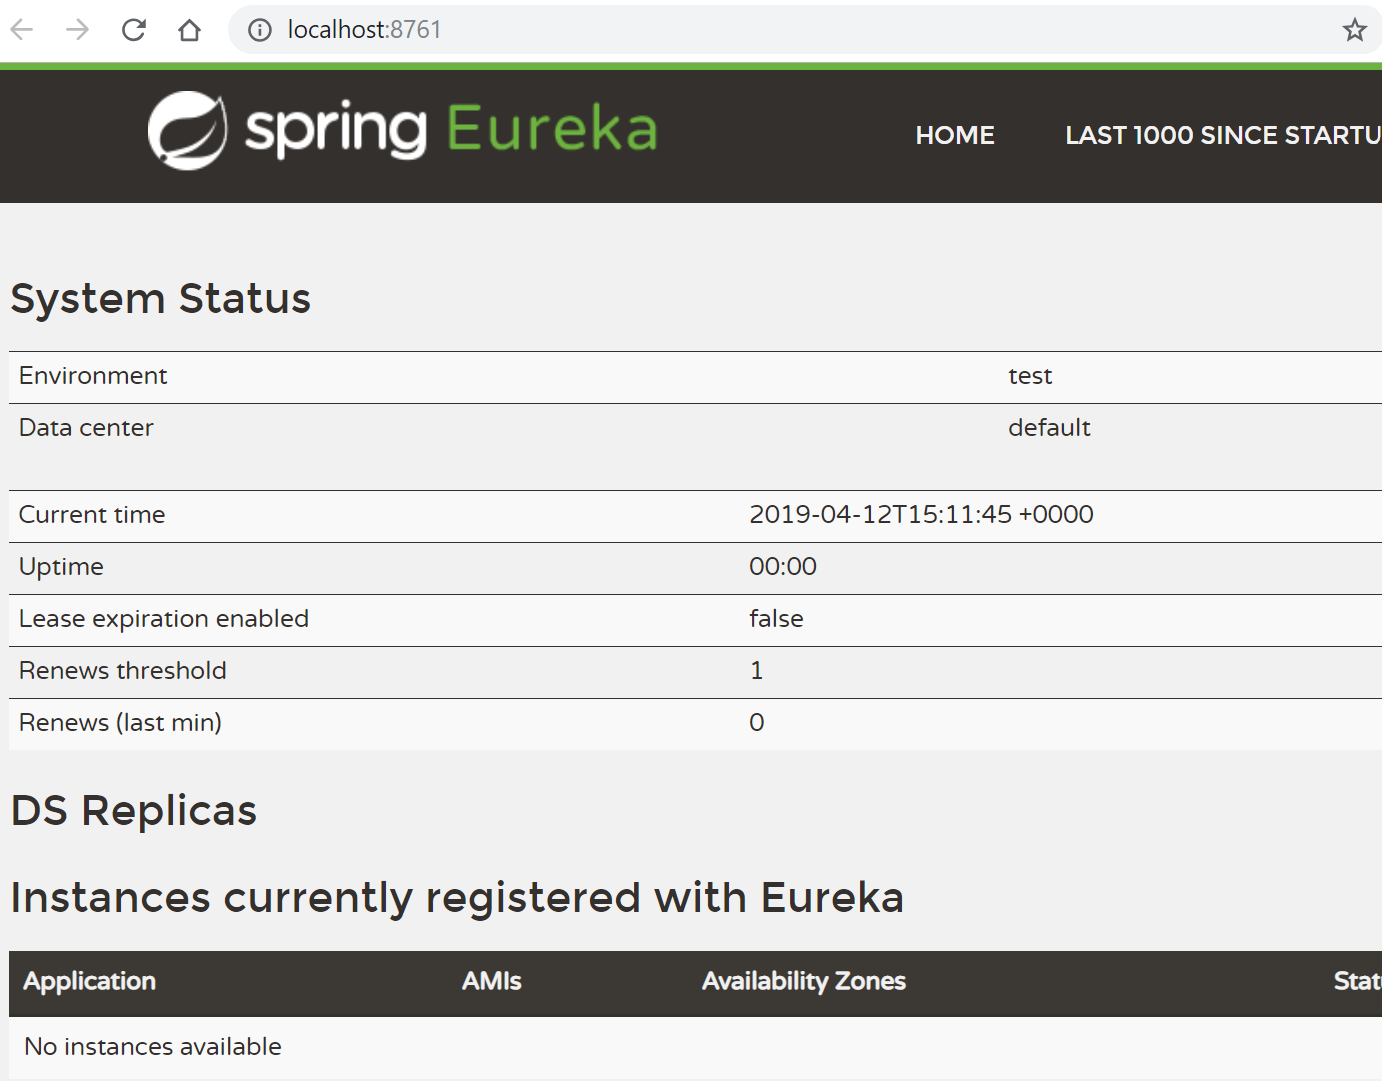
You should see that the Eureka server started correctly by opening your browser at: http://localhost:8761.
When the Eureka server starts, we are ready to present how Hazelcast instances can use it to discover themselves and form a Hazelcast cluster. There are three different use cases which you can encounter while setting up Hazelcast in the embedded mode together with your Spring Boot web service:
- Hazelcast Only: Eureka is used only for the Hazelcast discovery, but not for the web service
- Hazelcast with a separate Eureka Client: Eureka is used for both Hazelcast and web service, but each uses a different Eureka client
- Hazelcast reusing Eureka Client (Metadata): Eureka is used for both Hazelcast and web service and they both share the same Eureka client
Let’s present each scenario one by one.
2.1. Hazelcast Only
The first scenario is the simplest one, and it covers the case when you don’t need to register your Spring Boot application at the same time.
You need to add the hazelcast-eureka-one (and obviously hazelcast) plugin to your Maven dependencies.
<dependency>
    <groupId>com.hazelcast</groupId>
    <artifactId>hazelcast</artifactId>
    <version>3.12</version>
</dependency>
<dependency>
    <groupId>com.hazelcast</groupId>
    <artifactId>hazelcast-eureka-one</artifactId>
    <version>1.1.1</version>
</dependency>
Then, the Hazelcast configuration looks as follows.
@Bean
public Config hazelcastConfig() {
    Config config = new Config();
    config.getNetworkConfig().getJoin().getMulticastConfig().setEnabled(false);
    config.getNetworkConfig().getJoin().getEurekaConfig()
          .setEnabled(true)
          .setProperty("self-registration", "true")
          .setProperty("namespace", "hazelcast");
    return config;
}
You also need to configure the Eureka Client specific properties in the eureka-client.properties file.
hazelcast.shouldUseDns=false
hazelcast.name=hazelcast-only
hazelcast.serviceUrl.default=http://localhost:8761/eureka/
With such configuration, if you follow our source code, you can start two Spring Boot applications.
java -jar hazelcast-only/target/hazelcast-only-0.1-SNAPSHOT.jar --server.port=8081 --hazelcast.port=5703
java -jar hazelcast-only/target/hazelcast-only-0.1-SNAPSHOT.jar --server.port=8080 --hazelcast.port=5701
You should see in the logs that Hazelcast members formed a cluster together.
...
Members {size:2, ver:2} [
        Member [192.168.0.125]:5701 - e29accdc-5b84-4c03-801e-b0177a2befe3
        Member [192.168.0.125]:5703 - 60291603-164e-4c45-8e5d-6f7652dab930 this
]
...
In the Eureka web console, you should see the following “HAZELCAST-ONLY” entries.

What you just configured is the most straightforward Eureka-based Hazelcast discovery! Such configuration is good enough for most scenarios. Sometimes, however, you need to have both your application and Hazelcast registered in Eureka. The next two sections are dedicated to such situations. If you’re not interested in the discovery for the web service part, you can go directly to the section 3 and read how to check that the web service uses the Hazelcast instance correctly.
2.2. Hazelcast with a separate Eureka Client
If you want to have your application registered in Eureka together with Hazelcast, then the simplest way is to use different Eureka clients. Then, Hazelcast is registered separately and is visible in Eureka as a different application.
To achieve this effect, your Hazelcast configuration is precisely the same as in the previous point, but you need to add the Eureka Client configuration for your Spring Boot application. You can do it by adding @EnableDiscoveryClient to your main Application class and defining the following bootstrap.properties file.
spring.application.name=spring-boot-application
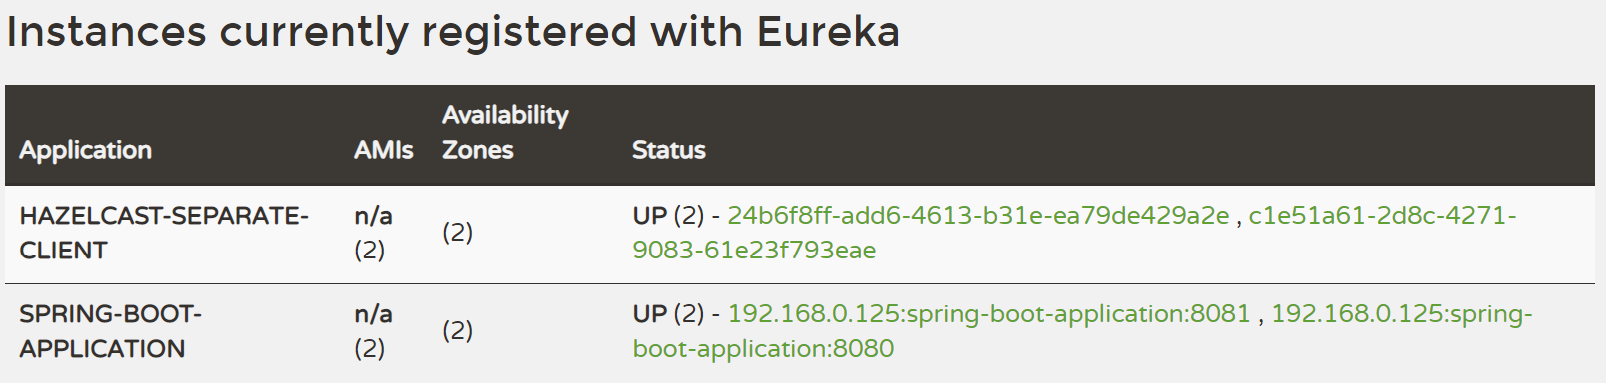
In this case, Hazelcast will be registered under the name “HAZELCAST-SEPARATE-CLIENT” and the application will be registered under the name “SPRING-BOOT-APPLICATION“.
With this configuration, if you follow our source code, you can start two Spring Boot applications.
java -jar hazelcast-separate-client/target/hazelcast-separate-client-0.1-SNAPSHOT.jar --server.port=8081 --hazelcast.port=5703
java -jar hazelcast-separate-client/target/hazelcast-separate-client-0.1-SNAPSHOT.jar --server.port=8080 --hazelcast.port=5701
Hazelcast members should form a cluster together as in the previous section and you should see two separate entries in the Eureka web console.
Again, you formed a Hazelcast cluster using the Eureka service registry! In the next section, we explore the last option which is when you want your Hazelcast instance and application registered as one Eureka client. Feel free to skip this section if it’s not of your interest, and move directly to section 3.
2.3. Hazelcast reusing Eureka Client (Metadata)
You may not want to have Hazelcast registered as a separate entry in Eureka. After all, Hazelcast is not a separate application, but a library embedded inside your Spring Boot application. In such a case, the Eureka plugin provides a solution to store the information about Hazelcast host and port in Eureka Metadata. Then, you can reuse the same Eureka client for the application and Hazelcast.
Change your Hazelcast configuration to include the metadata-related properties.
@Bean
public Config hazelcastConfig(EurekaClient eurekaClient) {
    EurekaOneDiscoveryStrategyFactory.setEurekaClient(eurekaClient);
    Config config = new Config();
    config.getNetworkConfig().getJoin().getMulticastConfig().setEnabled(false);
    config.getNetworkConfig().getJoin().getEurekaConfig()
          .setEnabled(true)
          .setProperty("self-registration", "true")
          .setProperty("namespace", "hazelcast")
          .setProperty("use-metadata-for-host-and-port", "true");
    return config;
}
With such configuration, if you follow our source code, you can start two Spring Boot applications.
java -jar hazelcast-metadata/target/hazelcast-metadata-0.1-SNAPSHOT.jar --server.port=8081 --hazelcast.port=5703
java -jar hazelcast-metadata/target/hazelcast-metadata-0.1-SNAPSHOT.jar --server.port=8080 --hazelcast.port=5701
Hazelcast members should form a cluster together as in the previous section and you should also see two separate entries in the Eureka web console.

Again, you managed to configure Hazelcast discovery using the Eureka plugin successfully. Let’s now have a look at how to verify that the application uses Hazelcast correctly.
4. Verifying the configuration
No matter which configuration you followed, you should have your Hazelcast cluster formed. If you followed our source code, then each Hazelcast instance is embedded into a web service with a few endpoints dedicated to operating on the Hazelcast data. We’ll use two of these endpoints to check that Hazelcast works correctly:
/put: inserts a key-value entry into Hazelcast/get: reads a value from Hazelcast by the key
Let’s first add a key-value entry into the first web service.
curl http://localhost:8080/put?key=some-key\&value=some-value
Then, we can read the value from the second web service.
curl http://localhost:8081/get?key=some-key
{"response":"some-value"}
We received the expected value from the second service, which means that the services work correctly and that the embedded Hazelcast instances formed a cluster together.
Conclusion
That’s it! We have just seen how to configure Hazelcast auto-discovery using Eureka in three different manners. The method used depends on your needs and the conventions adopted in the project. The beauty of Eureka is that you don’t have to bind yourself to any specific environment like AWS, GCP, or Kubernetes. It’s true that you need some additional configuration, but your service registry is separate and ready to deploy everywhere. What’s more, Eureka is well integrated into the Spring Boot framework, so if that’s your framework of choice, the configuration is as simple as a few lines of code.