
Senior Solutions Architect
Sharath Sahadevanis a Senior Solutions Architect with Hazelcast.In his role, he educates clients on Hazelcast and helps them be successful in adopting Hazelcast in their applications. He was awarded a patent -Systems and methods for monitoring payment transactions for fraud using social media. He has previously worked for Pivotal ( now acquired by VMware ) and MasterCard.
View all blogs by the authorMay 18, 2020
Getting Started with Hazelcast on Azure Kubernetes Service
This blog shows you how you can install Hazelcast on Azure Kubernetes Service (AKS) and connect to the cluster using an Hazelcast client. It assumes some familiarity with Kubernetes , Azure and Azure Cloud shell. The goal of this blog is to keep things simple and show you the steps to get up and running in a few minutes.
Here are the steps to get Hazelcast up and running on AKS.
Set up AKS on your Azure account
Use the Azure portal or CLI to create an AKS instance.
Note the resource group and the name of the cluster that you created. You will use those to get the AKS credentials below.
Get credentials from your AKS instance
Launch the Azure cloud shell. The Azure cloud shell comes preinstalled with the az command line interface.
Run the following command in your Azure cloud shell providing the resource group and clustername that you noted above:
az aks get-credentials --resource-group HazelcastDemo --name democluster
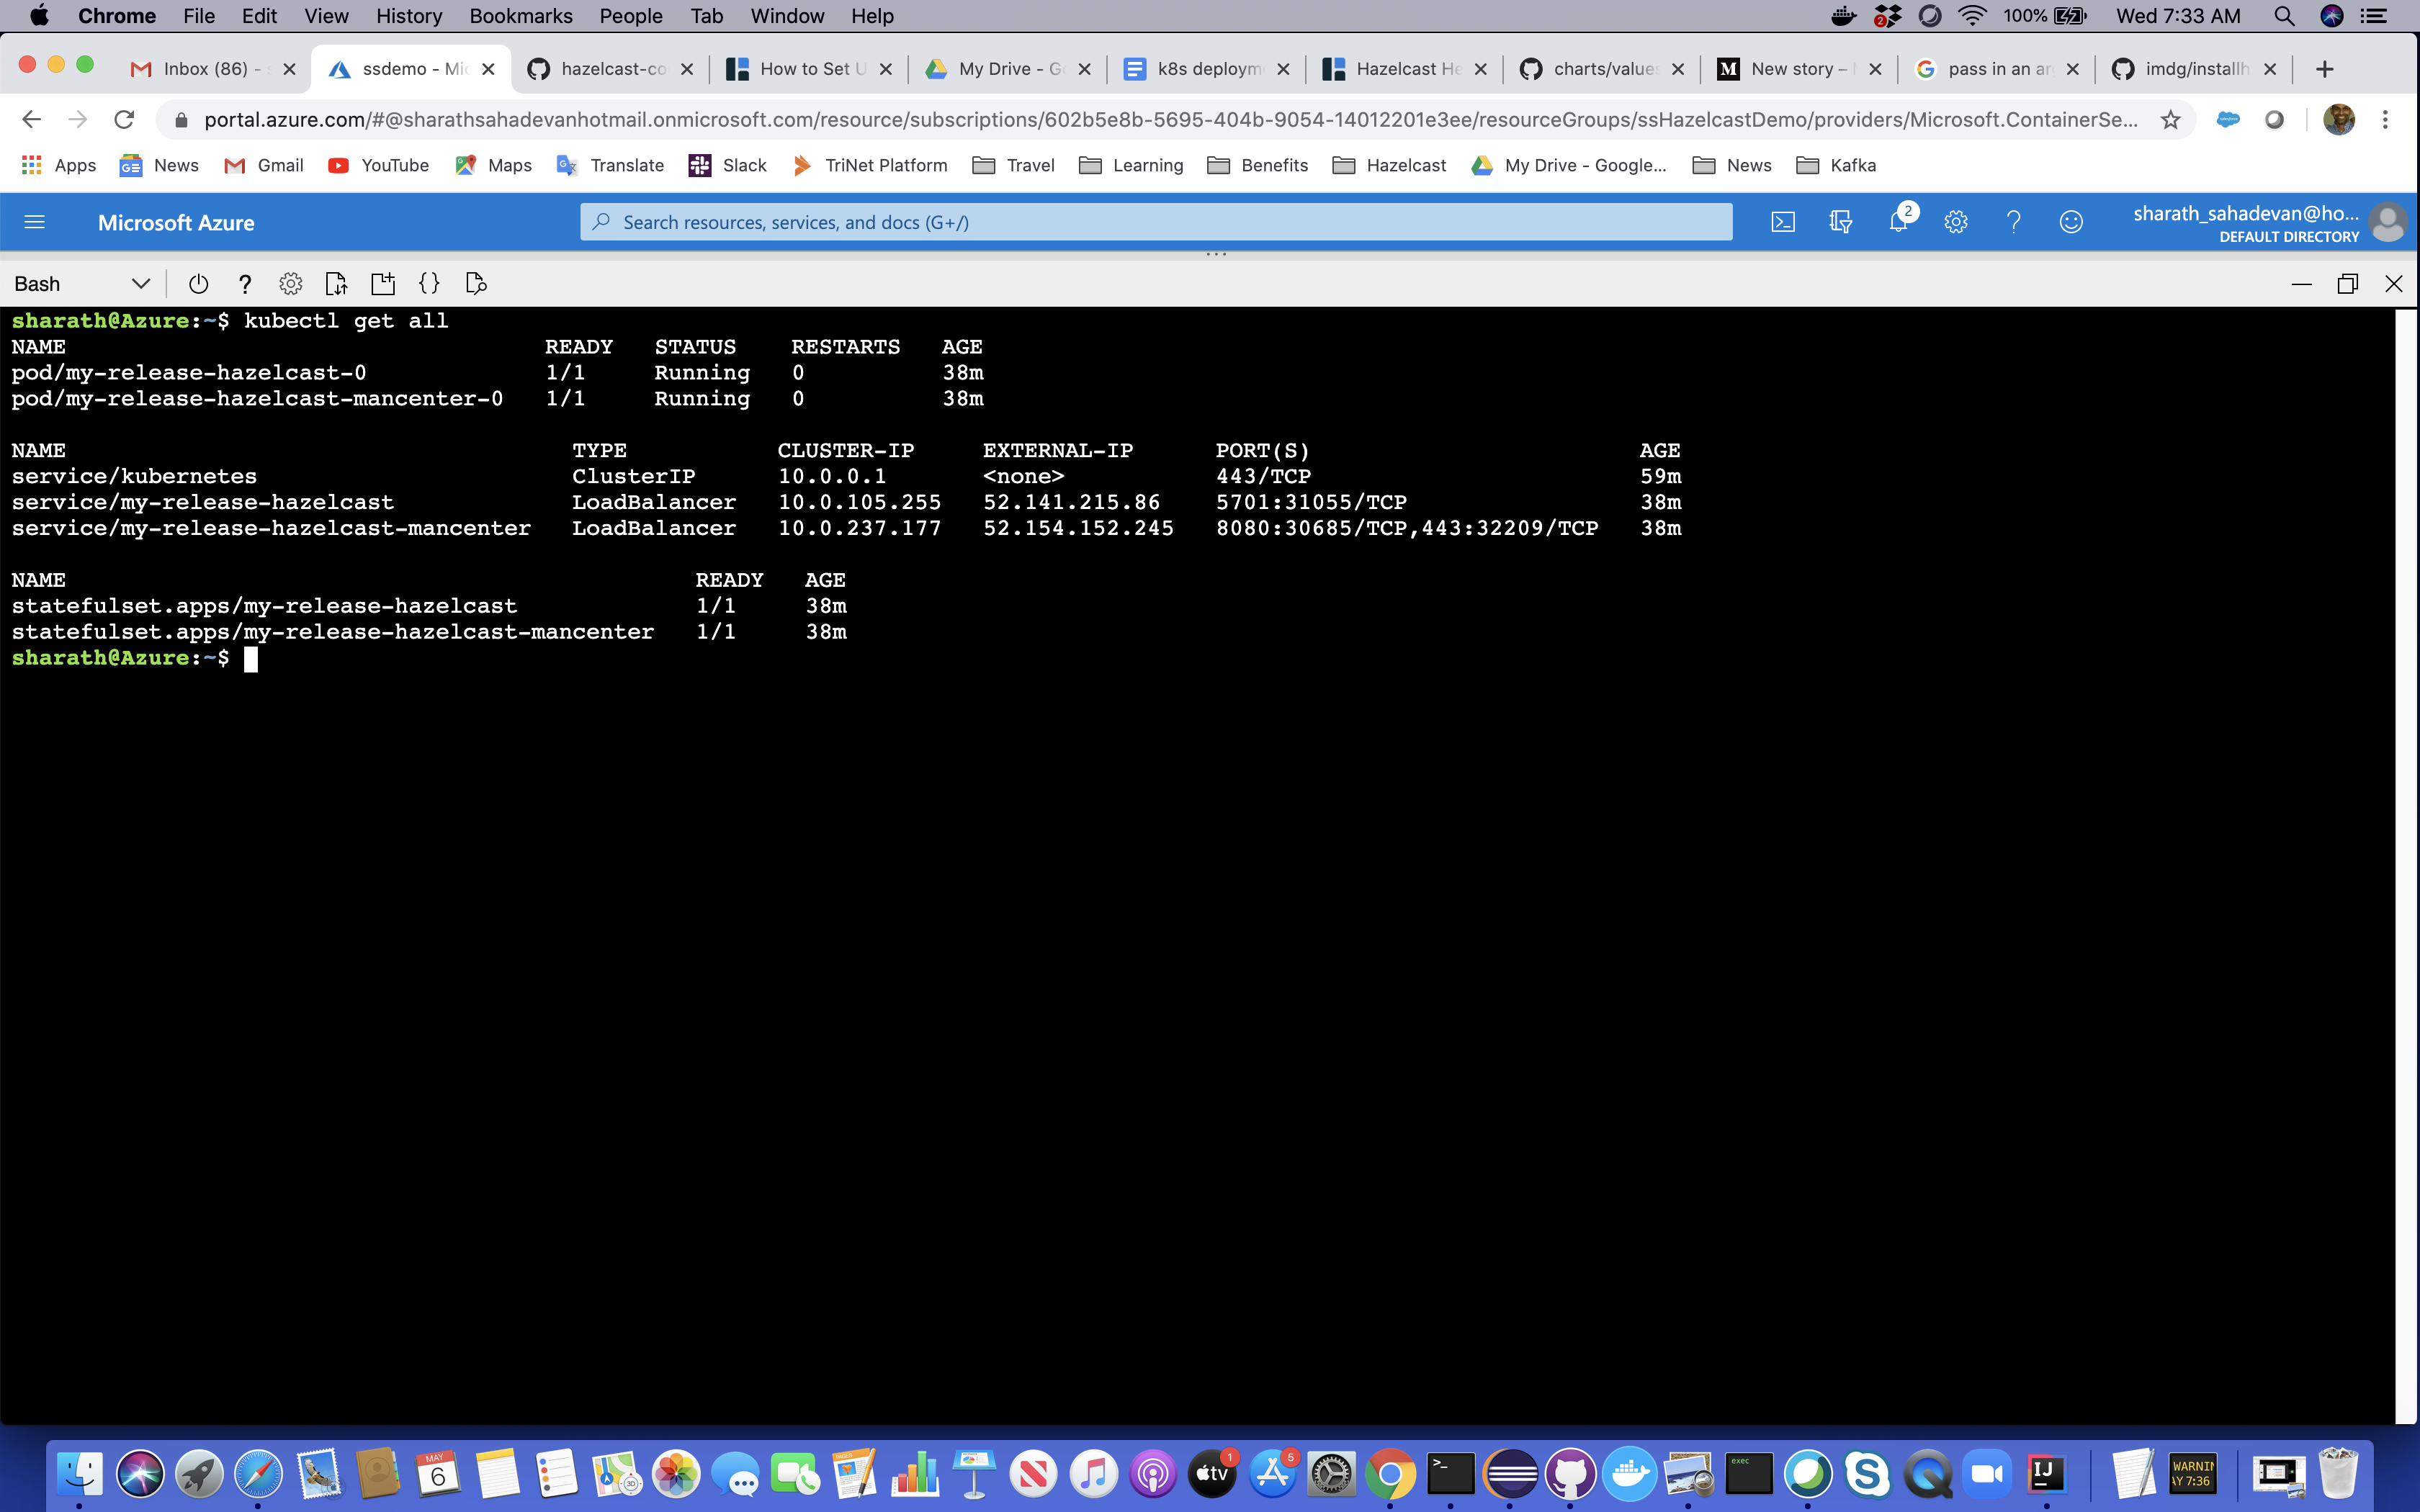
You can now verify that you can run kubectl commands.
kubectl get all
Install Hazelcast
I used the helm charts to install Hazelcast on the Kubernetes cluster.
Note: If you are using the Azure cloud shell , helm is already pre-installed. You can find additional details here.
helm repo add hazelcast https://hazelcast.github.io/charts/
helm install my-release --set service.type=LoadBalancer,service.clusterIP="",cluster.memberCount=1 hazelcast/hazelcast
Only one Hazelcast member is instantiated to keep things simple. As you scale the number of Hazelcast instances discovery of members in the cluster and Role Based Access Control ( RBAC ) configurations will come into play. You can find additional details here.
hazelcast and hazelcast-mancenter services.
Validate by Launching an External Client and Management Center
You can now view the management center at the exposed external IP address.
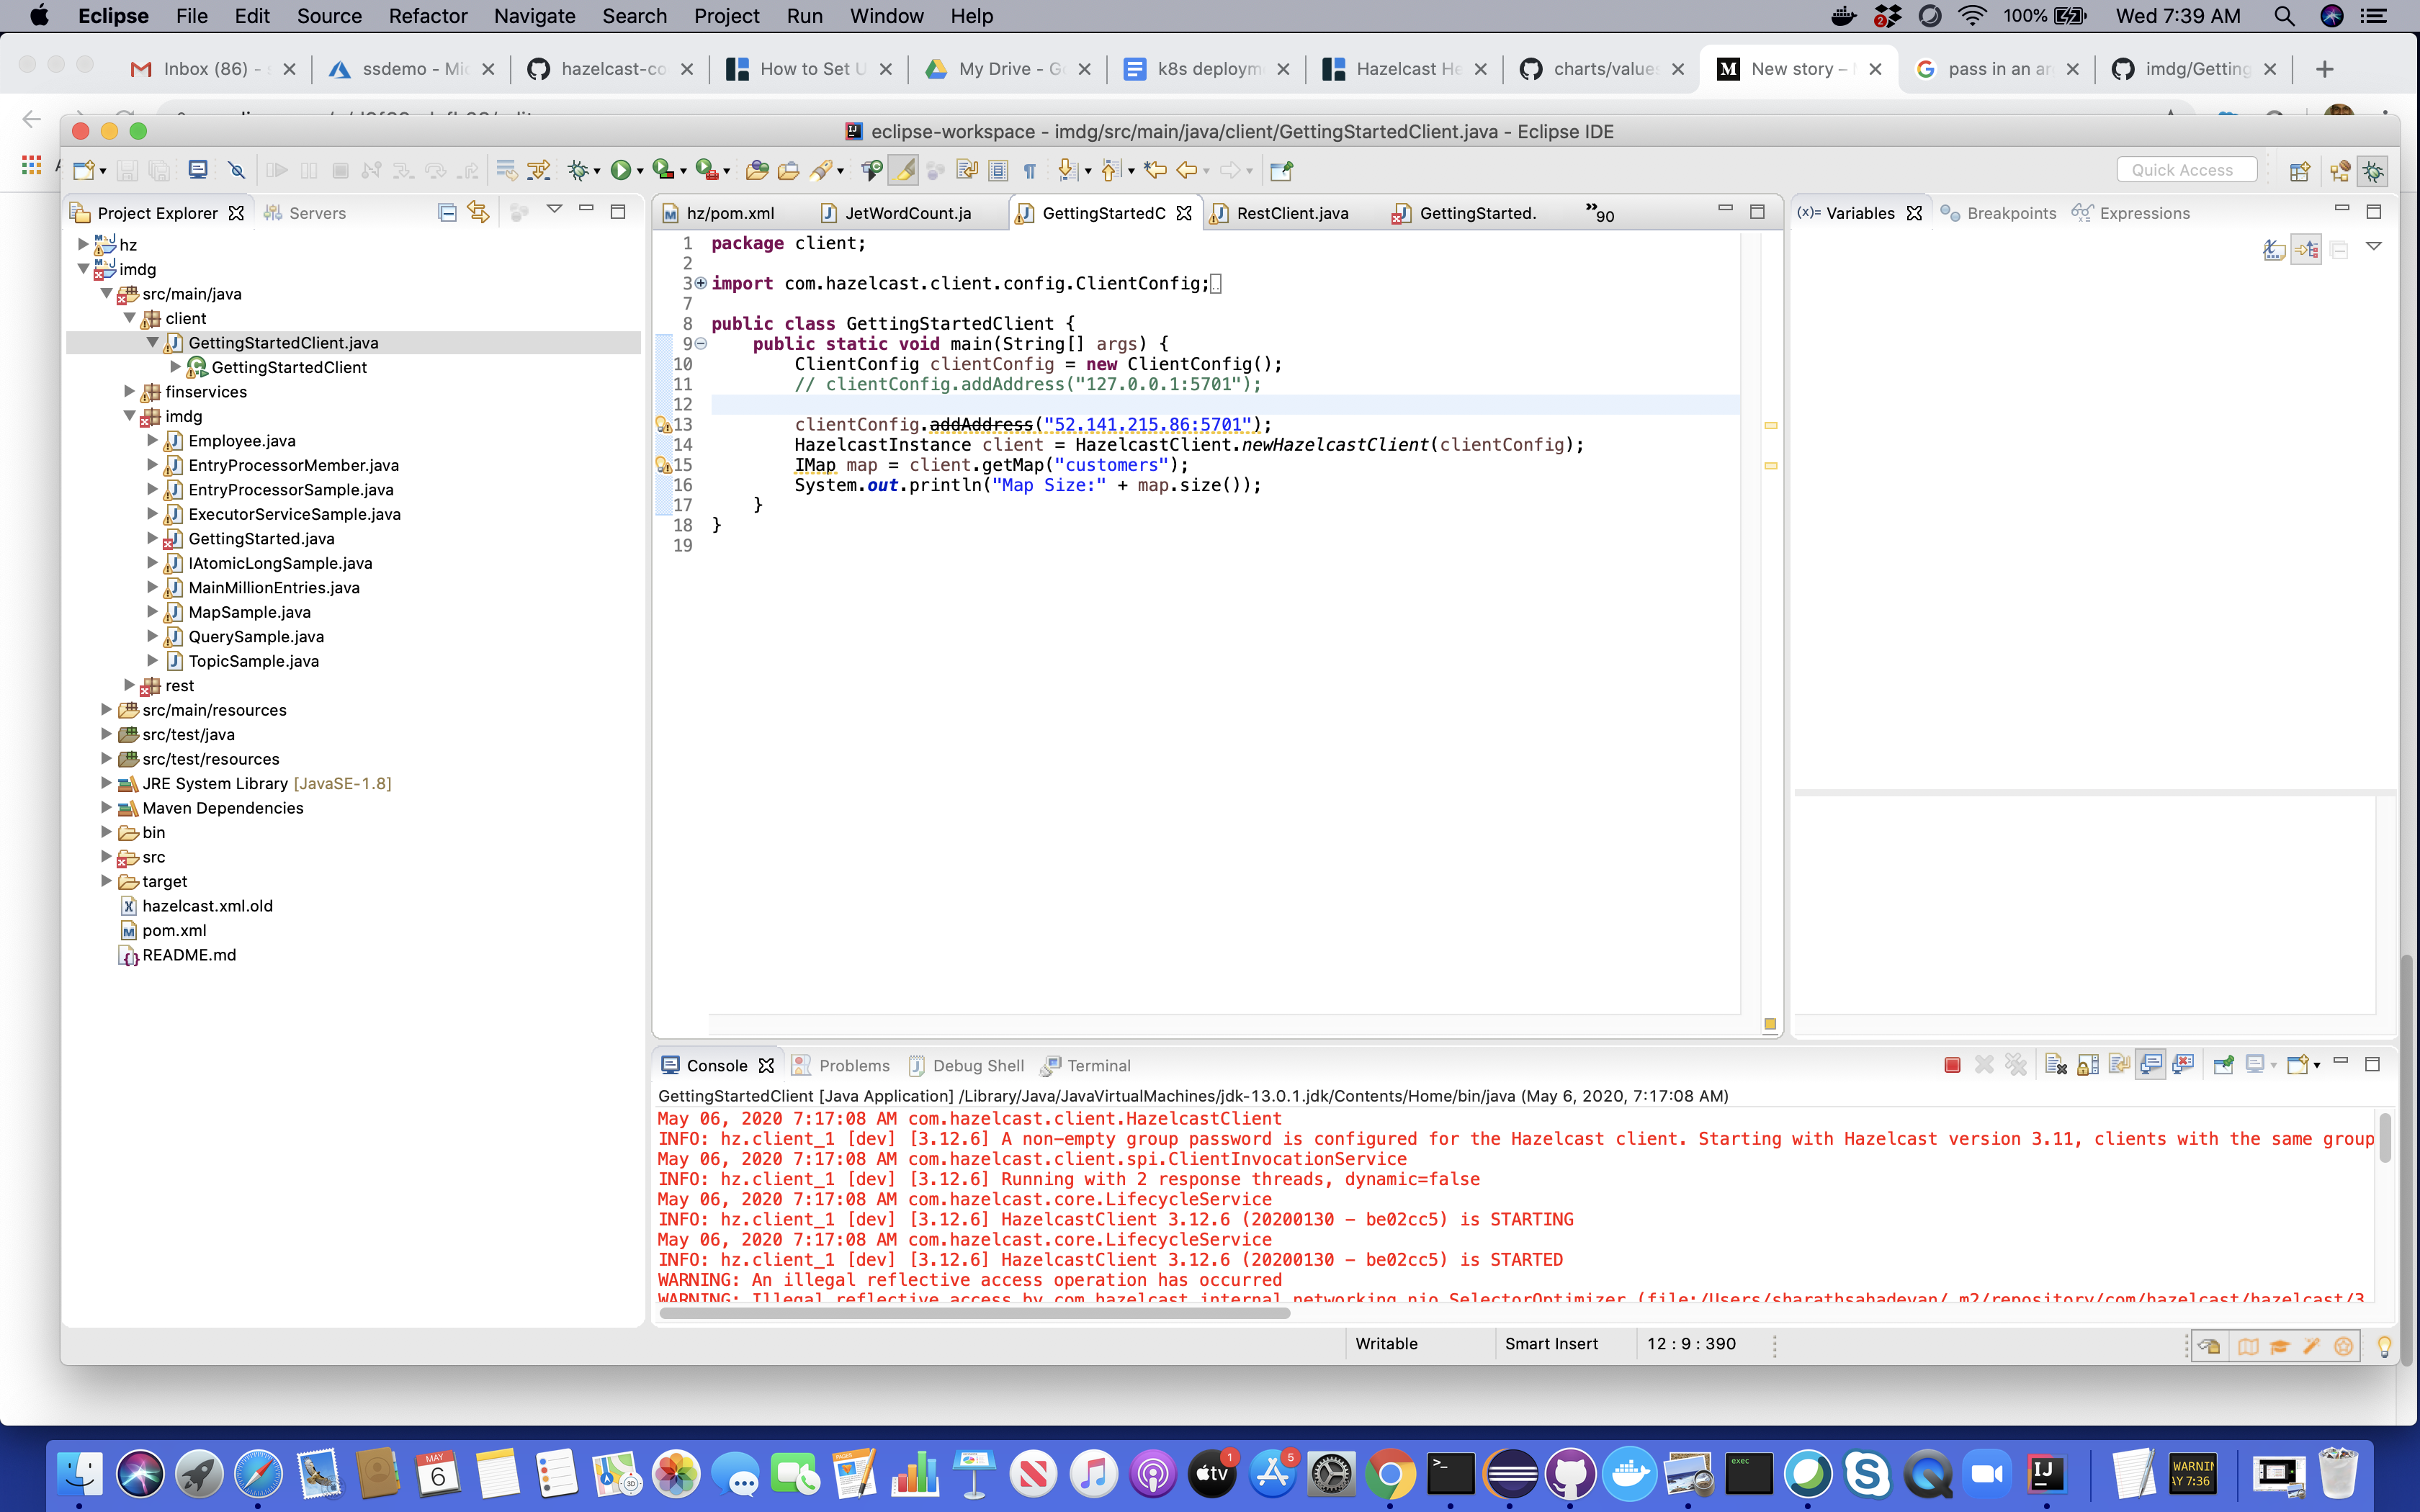
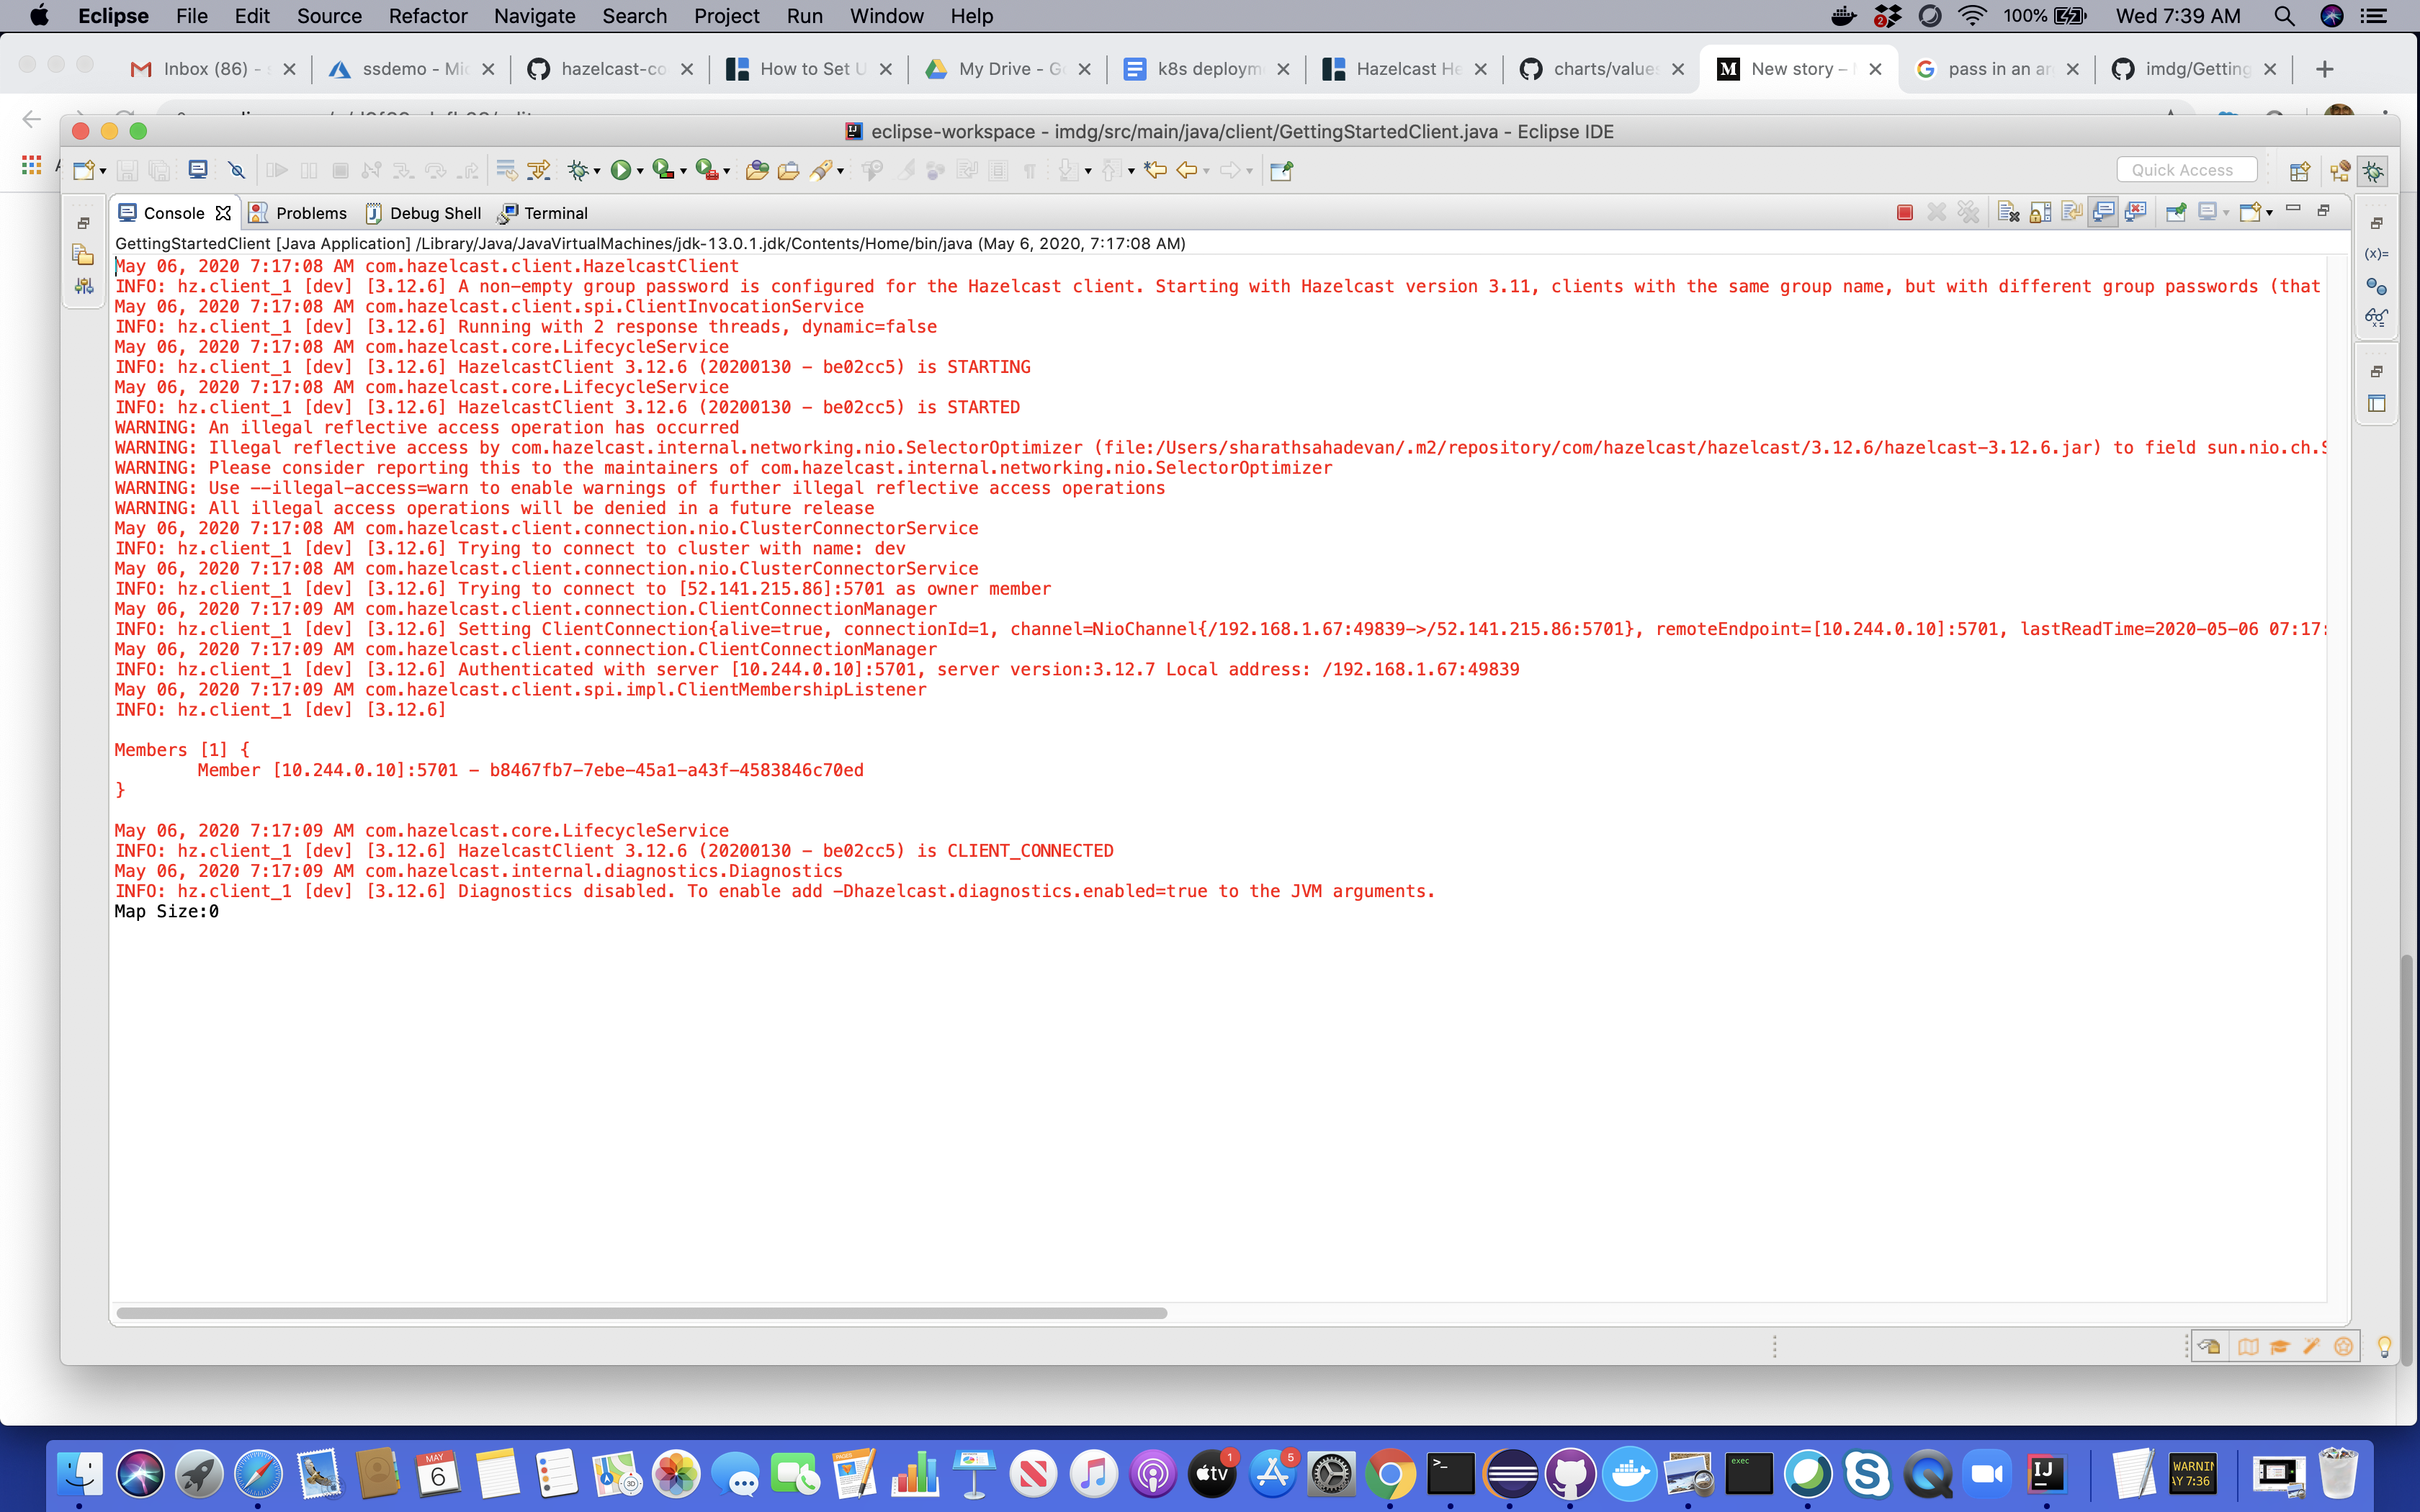
Similarly, you can connect a Hazelcast Client to Hazelcast external IP address.
Conclusion
In summary, it is pretty easy to get started on Hazelcast in any environment that has Kubernetes installed.
Additional Resources
- https://hazelcast.com/blog/how-to-use-embedded-hazelcast-on-kubernetes/
- https://hazelcast.com/blog/hazelcast-helm-chart/
- https://hazelcast.com/blog/how-to-set-up-your-own-on-premises-hazelcast-on-kubernetes/
- https://github.com/hazelcast/hazelcast-code-samples/tree/master/hazelcast-integration/kubernetes/samples/embedded
- https://github.com/hazelcast/hazelcast-code-samples/tree/master/hazelcast-integration/kubernetes
- https://github.com/hazelcast/hazelcast-code-samples/tree/master/hazelcast-integration/kubernetes/samples/external-client
- https://github.com/ssahadevan/imdg