Deploy and Monitor Hazelcast Cluster to Kubernetes – Part 1
In this article series, we are going make demo/tutorial about how to deploy and monitor hazelcast cluster to kubernetes. Also we will execute scale up/down scenarios, failover scenarios, changing configuration, rolling-upgrade cases.

Prerequisite
- Already running a kubernetes cluster. ( Use Minikube, Kops, GKE )
- Configured kubectl client
- Very basic kubernetes information ( Pod, Service, Deployment definitions)
Scenario
As a user, we want to deploy hazelcast cluster and hazelcast management center to our kubernetes cluster without making any configuration. Also we want to monitor our hazelcast cluster. We want to pass hazelcast.xml to hazelcast cluster. We want to scale up/down the hazelcast cluster easily.
Currently we don’t have any running pods,services etc.. We selected to use minikube, you can install minikube from here.

Now lets look this deployment file. This file defines our deployment configuration of hazelcast inside kubernetes cluster. There will be 2 replicas and we will use hazelcast/hazelcast docker image.
apiVersion: apps/v1beta1
    kind: Deployment
    metadata:
      name: hazelcast-deployment
    spec:
      replicas: 2
      template:
        metadata:
          labels:
            app: hazelcast
        spec:
          containers:
          - name: hazelcast
            image: hazelcast/hazelcast
Create a deployment.yml file and write configuration above.
Then execute following command:
kubectl apply -f deployment.yml
You can check your pods with following command.
kubectl get pods

Currently containers are creating. You might wait 3–5 minutes according to your internet connection speed. Then the status will be running
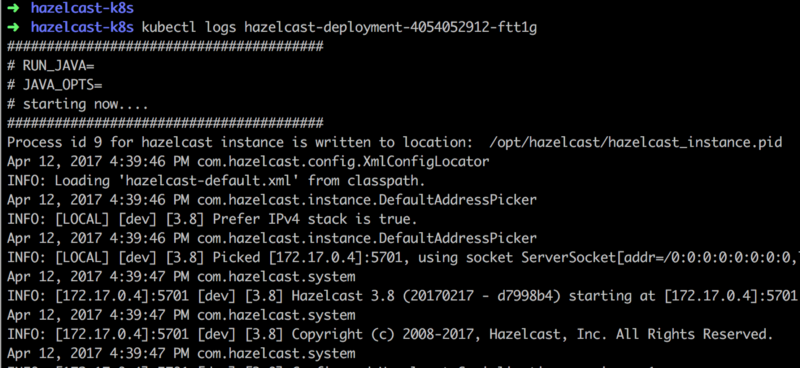
Also you can check the logs of the pod with following command
kubectl logs $POD_NAME

You will see that hazelcast members will form a cluster. If you use overlay network on your cluster, you don’t have to use discovery plugin for your hazelcast cluster. Hazelcast members will discover each other by multicast. ( I have tried this scenario in KOPS also, it is verified )
So lets add management center to our kubernetes cluster.
Add following section to your end of your deployment.yml file
---
   apiVersion: apps/v1beta1
   kind: Deployment
   metadata:
     name: management-center
   spec:
     replicas: 1
     template:
       metadata:
         labels:
           app: management-center
       spec:
         containers:
         - name: hazelcast
           image: hazelcast/management-center
Then execute:
kubectl apply -f deployment.yml

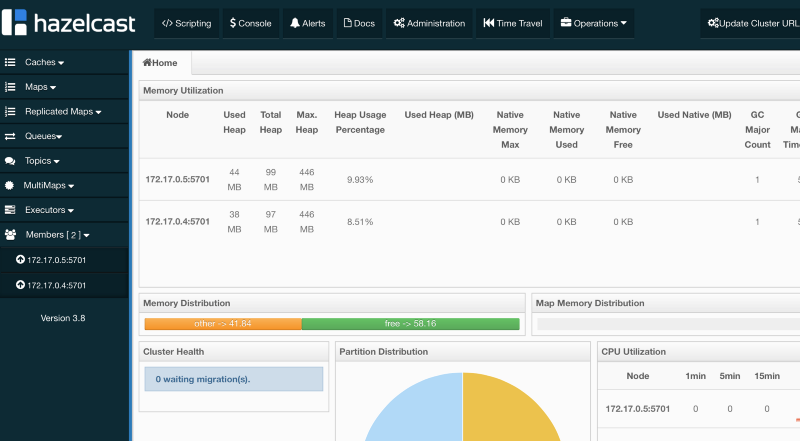
As you see, the management center pod has been created. You can see logs also by executing kubectl logs $POD_NAME

Then how to connect management center from the browser. In kubernetes you can expose your pods by using services or ingress rules.
We will create a new service. Add following section to end of your deployment file.
---
    kind: Service
    apiVersion: v1
    metadata:
      name: my-service
    spec:
      type: NodePort
      selector:
        app: management-center
      ports:
        - protocol: TCP
          port: 8080
          targetPort: 8080
Then execute same apply command.

If you are use KOPS you can use LoadBalancer as service type. So that you can reach your pod by using AWS load balancer.
If you are using minikube execute following command:
minikube service my-service
A browser will be opened then write mancenter to end of your url.

Conclusion
In this tutorial, we have created 2 deployments and 1 services. In the deployment configuration, you can define your containers, replica counts, mount paths, env. variables etc.. In other words, a deployment file is a configuration file so that kubernetes master creates pods according to these definitions.
In services, we are defining how access those pods. We need to access management-center pod so that we have created a service to expose our pod to outside world.
In next tutorial, we will continue with scaling up/down and passing hazelcast.xml to kubernetes hazelcast cluster.
You can find latest deployment file from here:
https://gist.github.com/anonymous/ca3d46c5185f8def24d16e0877f7486b
Just execute following command 🙂
kubectl apply -f
    https://gist.githubusercontent.com/anonymous/ca3d46c5185f8def24d16e0877f7486b/raw/b6dd5272ce573ccf84a05bab9205bd6431780ad3/gistfile1.txt
