
By Serkan Ozel
Software Engineer
Serkan is a software engineer who graduated from Bogazici University. Before Hazelcast, he worked at a cybersecurity startup as a backend developer. His interest in open source led him to Hazelcast clients, to which he contributed before joining Hazelcast. He enjoys learning new things in his field and sharing them with others. Nowadays, he is working on Hazelcast Node.js Client in the APIs team.
View all blogs by the authorJun 29, 2022
Accessing Hazelcast via REST Using A Proxy
In this blog, we will build a Hazelcast REST proxy. You can use this kind of REST proxy to access Hazelcast from environments where you can’t use a native client, e.g., an Android application or a programming language where there is not a Hazelcast Client SDK. The REST proxy will use the Hazelcast Node.js Client behind the scenes and access a Hazelcast server. Our REST API will work with JSON data.
First, we will define the API using OpenAPI on the Swagger website. You can find the whole API specification here. To summarize the API in this example, we have:
- Map Operations
- Get: Given a map name and key returns the value.
- Set: Given a map name, key and value, set the value to the key in the map.
- Delete: Given a map name and a key deletes the entry with the given key in the map.
- SQL Operations
- Execute: Given an SQL string, parameters, and options, execute an SQL statement. This call returns the first page of the SQL query. This API returns an SQL query ID to fetch the other rows or close the query.
- Fetch Rows: When using the Node.js client, you don’t bother fetching rows; it is done automatically behind the scenes. In a REST API, however, you need to do this for the API to be efficient. We could also have avoided the paging altogether and returned all the rows in Execute. However, for significant results, this would degrade performance.
- Close: Given an SQL query id, closes the query.
More operations can be added, but we only have these operations for simplicity.
Swagger can generate a template code from your API specification. I developed the code for the node server, edited it, and put the code in this repo.
After cloning the repo and installing the dependencies with npm install, we will start a Hazelcast instance because our REST API connects to Hazelcast via the Node.js client. For that, I used the following docker command:
docker run -p 127.0.0.1:5701:5701 hazelcast/hazelcast:5.1
Then, we can start the REST proxy server with npm start. The API will be ready at localhost:8080.
![]()
Let’s open Postman. I have prepared a set of requests that you can access here. First, let’s try map-related requests. Let’s add some entries to the map.

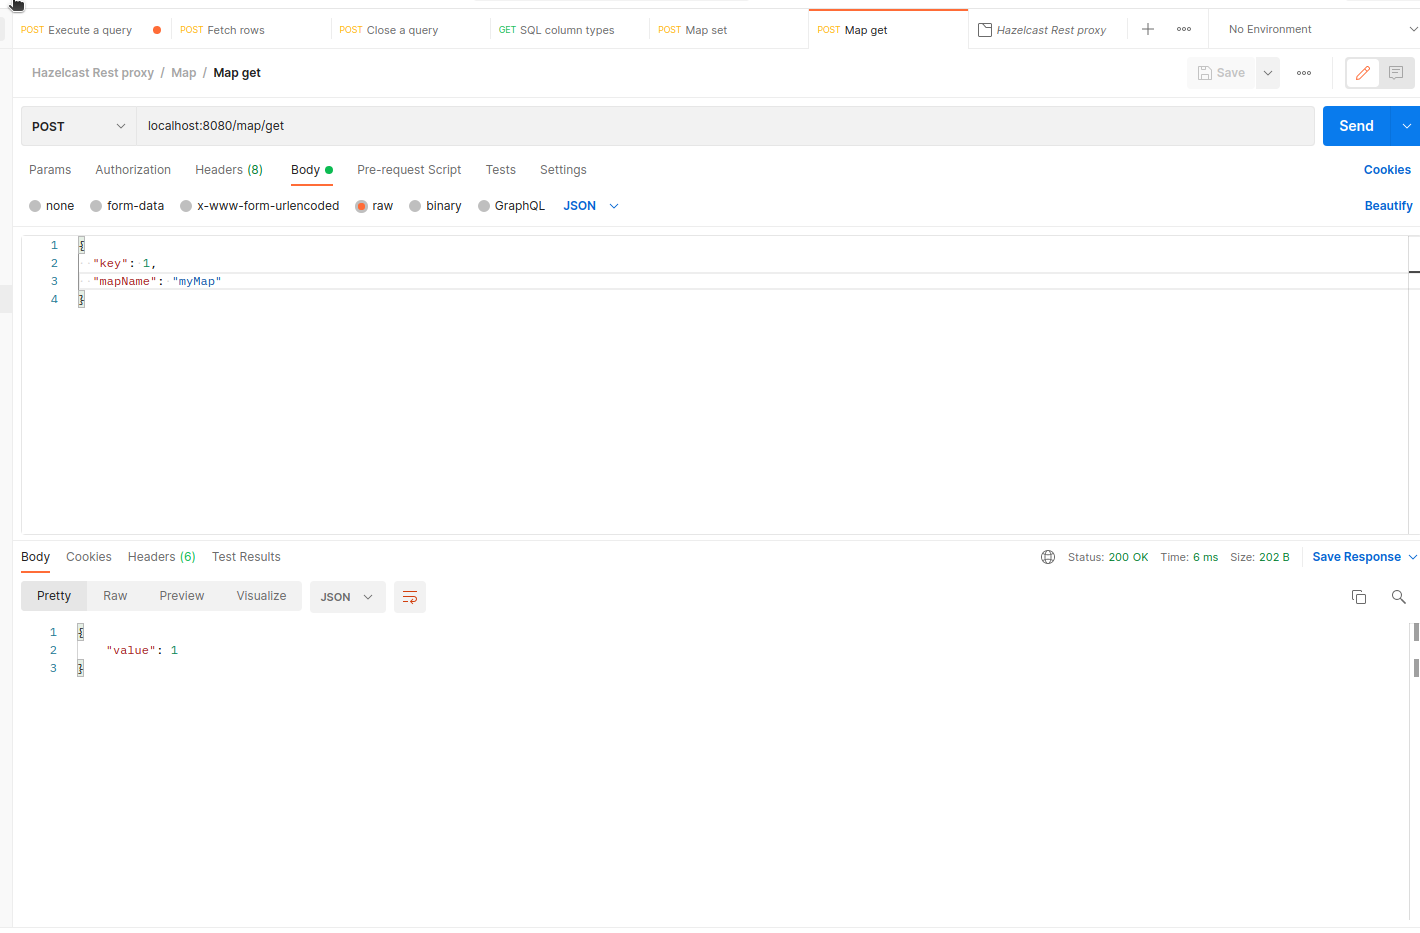
Using the set request, I have added five entries to the map. Now let’s get access using the get request:
Let’s try deleting an entry as well:

After deleting the entry, the value is null:

Let’s add the entry again and continue with SQL requests. For brevity, I will only show an SQL query with one page. However, paging is not complex; you can try it yourself.
We need to create an SQL mapping to run a query on a map. We will run the CREATE MAPPING query to use the /sql/execute endpoint.

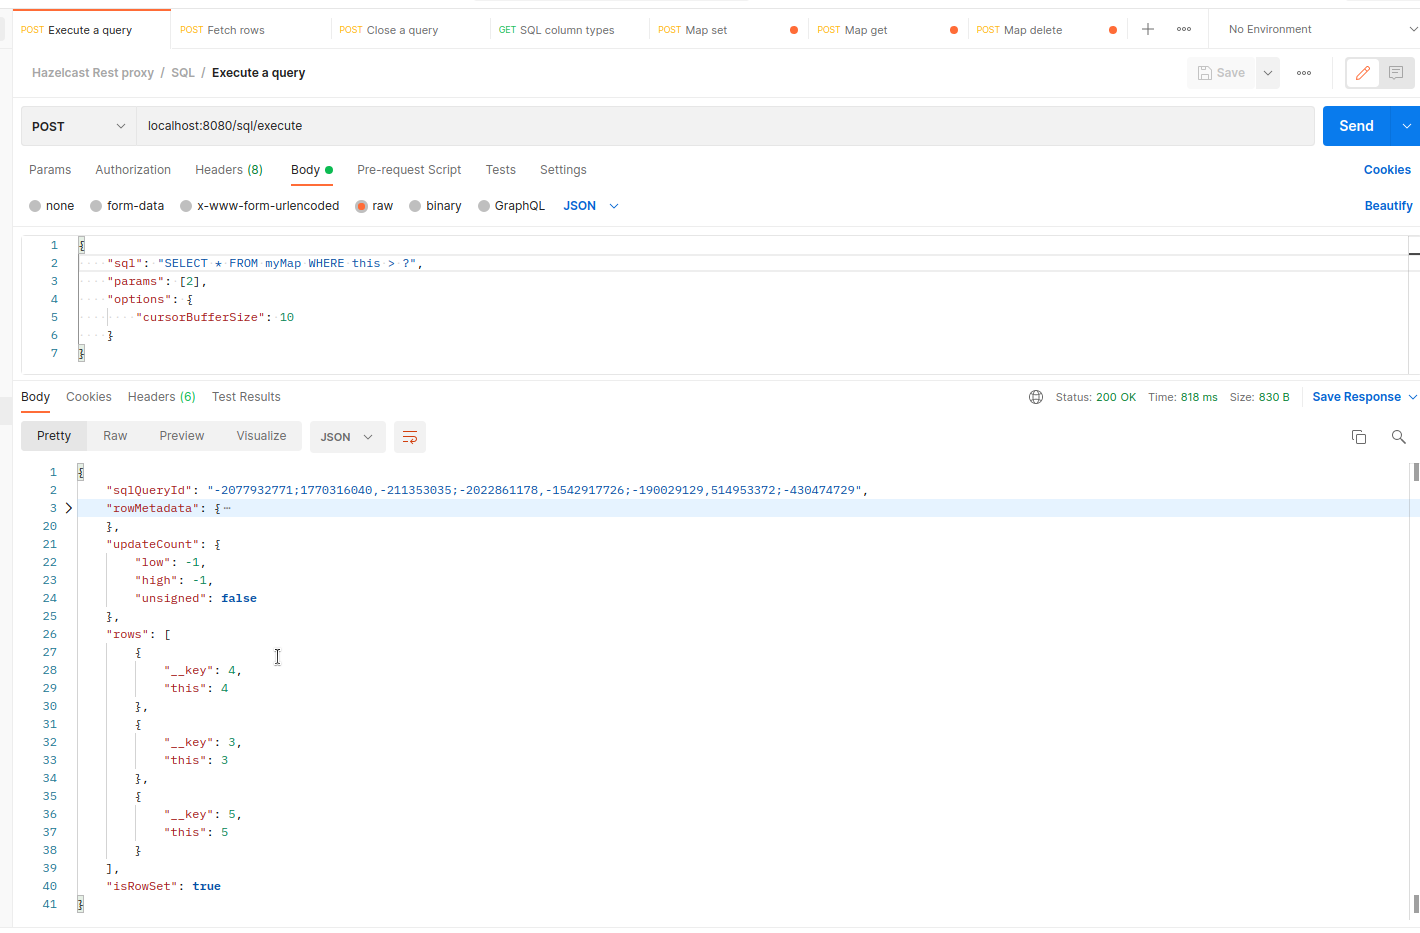
After creating the mapping, we can run our query. The query is a simple SELECT with a condition: SELECT * FROM myMap WHERE this > ?. This query selects every entry in the map where the corresponding value is greater than ?. ? is replaced by our parameter sent along with the SQL string. This is a unique identifier which means the values on the map. We sent parameter 2, so we expect three rows in results 3, 4, and 5.
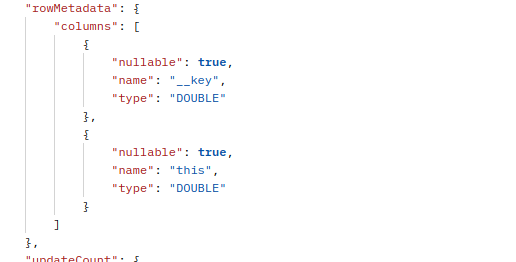
Under the rowMetadata key, we can find the information about the rows:
In this blog post, we built a Hazelcast REST proxy using the Node.js client. You can improve the server implemented in this article in various ways, such as using WebSockets to send events to a consumer of the REST API or adding more data structure endpoints. Don’t forget to share your opinion about this blog post and your projects in our Slack channel. See you next time!