Hazelcast On Kubernetes Made Fairly Easy
An step-by-step example to running Hazelcast on Kubernetes, the classic “Hello World” style beginners introduction.
The sample includes instructions and screenshots for running on Mac.
The process is essentially the same for Windows or Linux, although for Windows you will need a version that supports the appropriate networking (Windows 10 Professional not Windows 10 Home, for instance).
See here for the code.
You don’t need to be an expert on Hazelcast or Kubernetes to make this work, as we’ll explain the terminology and details as we go. It’s not trivial, but we’ll make it as simple as we can.
The code sample runs everything, including Kubernetes, on your computer. You don’t need access to a cloud provider of infrastructure. However, because it all runs on your computer, your computer will need to have a reasonable degree of power for it to work, as detailed in the next section.
Pre-requisites
Kubernetes oversees a number of independent machine images, a bit like virtual machines. In this sample these will all run on your computer. So your computer needs enough strength to support all this load.
This sample has been validated on a 4 core machine with 16GB of RAM, and this was borderline for performance. It worked but slowly.
If you have less power than this, it’s unlikely to work for you, your machine will start swapping and grind to a halt.
Hazelcast concepts
Hopefully you’re familiar with this, but a quick recap does no harm.
A Hazelcast server is a collection of Java objects that run within a JVM and take responsibility for storing some data in memory. Other things can be happening in that JVM, and if that’s your business logic this is usually described as “embedded” mode.
A Hazelcast client is another collection of Java objects that run within a JVM, but don’t take responsibility for storing data. Instead they connect to Hazelcast server(s) across the network. Again, other things can and usually will be happening in the Hazelcast client’s JVM, and this is described as “client-server” mode.
This example uses both Hazelcast clients and Hazelcast servers, each of which are wrapped by Spring Boot into standalone deployment units.
So in fact here we have a mix of “embedded” mode and “client-server” mode. Some business logic is in the Hazelcast server JVMs, and some business logic is in the Hazelcast client JVMs, we put the logic where it makes the best sense.
Hazelcast clients don’t have to be Java of course, but that’s what they are in this example.
Example without Kubernetes
The first step we’ll take is to run the example without Kubernetes, Docker, or all the other platform stuff.
Use mvn clean install to build the example from the top level.
Hazelcast Management Center : start.sh
If you haven’t already, you should download the latest Hazelcast Management Center from here and start it up.
The start-up script is start.sh, this will launch an instance on port 8080 and direct you to the login screen.
By default the Hazelcast Management Center uses your home directory to hold set up information. If this the first time you’ve started it, you’ll be prompted to create an account for the >”admin” user and set a password.
You’ll come across this set up again once we add Kubernetes, but more on this later.
For now, you should log in to the Hazelcast Management Center, but we haven’t started a cluster so there won’t be anything interesting to look at.
Hazelcast Server : java -Dserver.port=8081 -jar the-server/target/the-server.jar
Start the Hazelcast server using the standalone Jar file build by Maven.
Note we use -Dserver.port=8081 so that the Tomcat web server component inside this Jar file binds to port 8081 to avoid clashing with the Hazelcast Management Center.
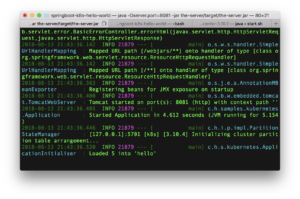
Towards the end of the start-up, you should see a message that 5 data records have been loaded, like this:
Test the Hazelcast server
Try this command,
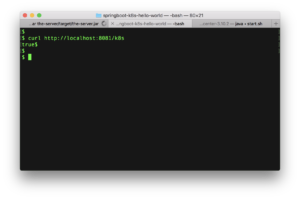
curl http://localhost:8081/k8s
This command exercises the REST controller added to the Hazelcast server’s JVM, that checks if the cluster is active.
So you should get output like this.
What this command is doing is testing a REST endpoint “/k8s”. This will be used later on by Kubernetes to check the health of the Hazelcast server, but it’s just a REST endpoint so we can test it too.
If everything is ok, we expect the result “true”.
“k8s” is a common abbreviation for Kubernetes, 3 characters instead of 10, much less typing.
Check the Management Center
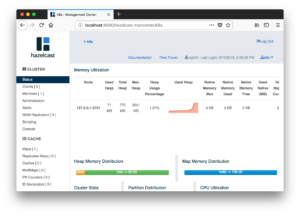
Refresh your Management Center web page, or log out and in. Look for the cluster named “k8s”.
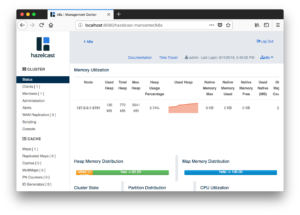
You should see that this cluster has 1 server member in the group:
Hazelcast Client : java -Dserver.port=8082 -jar the-client/target/the-client.jar Start the Hazelcast client using the standalone Jar file build by Maven.
Again note the use of -Dserver.port=8082 for the Tomcat web server. 8082 is a just a choice that should be unique, as Hazelcast Management Center is using 8080 and the Hazelcast Server is using 8081. This process is therefore both a web server and a Hazelcast client.
Test the Hazelcast client
Try this command,
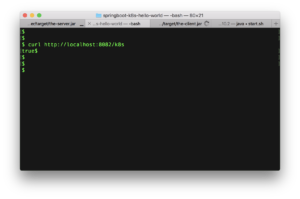
curl http://localhost:8082/k8s This tests the “/k8s” REST endpoint again. The Hazelcast client implements this in the same way as the Hazelcast server, so that Hazelcast can test the process for it being in a satisfactory state.
Again, we can test it too, so we do. We expect the result “true” if the Hazelcast client is fit to use.
Test the Hazelcast client again
Try this command,
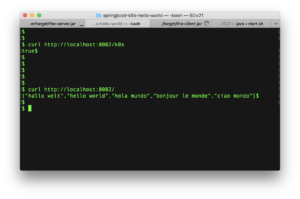
curl http://localhost:8082 This tests the business logic, which returns a collection of values stored in the map named “hello”.
What we get back is “Hello World” in 5 languages, like this:
Check the Management Center again
On the Management Center, you should now see one server member and one client connected.
Shutdown If we’ve got this far, then we know that the Hazelcast client and Hazelcast server at least run fine on a bare metal deployment. So if they don’t work once we add Kubernetes we’ll be more sure of which step has gone wrong.
Shut down these Hazelcast Client, Hazelcast Server and Hazelcast Management Center processes as we won’t need them again, and we want to avoid unnecessary load on your machine. Killing off the three processes is the easiest way.
Kubernetes concepts
It’s time now for some concepts about Kubernetes, simplified but still valid.
Docker
Firstly, Docker is not part of Kubernetes.
Docker is a “container” system much like a virtual machine. If you think of it like a virtual machine you won’t be far wrong. You won’t be right either, but it’s close enough.
You bundle your application into a Docker “image”, which you deploy to a run time “container” that executes it. So the container is a bit like a virtual machine, except it hosts only that one application.
Kubernetes, Containers and Pods
Kubernetes is an eco-system for organising containers such as Docker. It’ll start them, stop them, and look after them on our behalf, subject to a little guidance.
Kubernetes has many features, and we’ll ignore most of them for this demo.
One thing that needs a mention though is pods. Kubernetes groups containers into collections it calls “pods”. A Kubernetes set-up might have many pods and each pod might have many containers. Each pod in this demo will only have one container.
Minikube
Minikube is an implementation of Kubernetes, for running on one machine. This limits it’s usefulness in terms of scaling to many pods but it’s great for getting started as you don’t need lots of hardware.
Set-up
Now finally we need to get Kubernetes bits installed on your machine.
There are four of these to do, Docker, VirtualBox, Minikube and Kubernetes CLI.
Each has their own install instructions, and it’s best to refer to their own websites for this.
Docker
Docker is a tool for creating containers on a machine. Containers are like miniature virtual machines, containing single applications.
See here for Docker.
You could install it this way
brew cask install docker
VirtualBox
Virtual Box is a tool for creating virtual machines on your physical machine. We’ll need it for Minikube.
See here for Virtual Box.
You could install it this way
brew cask install virtualbox
Minikube
Minikube is an implementation of Kubernetes that runs solely on your machine. Hence it’s is “mini” compared to a normal Kubernetes set up that would use multiple physical machines.
See here for Minikube.
Minikube uses something to provide a virtual machine on your physical machine. Here we use VirtualBox installed in the previous step,
You could install it this way
brew cask install minikube
Kubernetes CLI
The last thing to install is the Kubernetes command line interpreter, so we can interact with Kubernetes via a terminal window.
See here for the Kubernetes CLI install instruction.
Remember, Minikube here is the Kubernetes implementation. The tool we install here (mainly kubectl the KUBErnetes ConTroL program) is just for easy interaction.
You could install it this way
brew install kubernetes-cli
Running Kubernetes
And with Kubernetes ready to use, let’s use it.
docker images
On Docker, images are ready to deploy bundles. So we use the docker images command to list them.
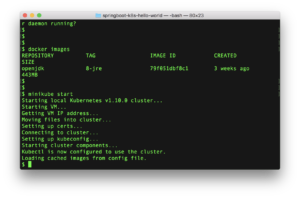
Here we don’t actually care what images exist, we’re doing this command as a way to test is Docker is running.
If Docker isn’t running, you’ll get an error message as seen towards the top of this screenshot. If it’s not running, go start it.
If Docker is running, you’ll get a list (possibly empty) of some ready to deploy images. 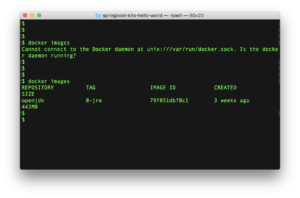
minikube start
Once Docker is running, use the minikube start command to start Minikube. This might take a minute or two.
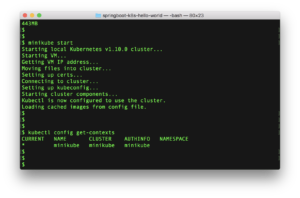
kubectl config get-contexts
Now run the kubectl config get-contexts to see what Kubernetes implementations are available.
kubectl is the KUBErnetes command line ConTroL program.
Since we’ve only installed Minikube, we would only expect to find this implementation.
Docker environment
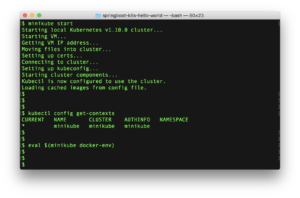
We next need to connect Kubernetes to our Docker, so that Kubernetes can find application images to deploy to the machines it creates.
On Mac the command is eval $(minikube docker-env)
Note, as this command sets up temporary environment variables, you should continue to use this command window for the rest of the tutorial.
Example with Kubernetes
Assuming you have got this example to work on your machine, it’s now time for the fun, magic and much waiting around that Kubernetes brings to the party.
Modules
Let’s start with a look at the example, and some key files
├── the-client/
├── the-client/src/main/resources/hazelcast-client.xml
├── the-client/Dockerfile
├── the-server/
├── the-server/src/main/resources/hazelcast.xml
├── the-server/Dockerfile
├── deployment.yaml
├── pom.xml
├── README.md
There are four kinds of files, “.java”**, “.xml”, “Dockerfile” and “deployment.yaml”.
the-client : Application.java, ApplicationConfig.java, MyK8SController.java & MyRestController.java
The main coding to look at is here in ApplicationConfig.java. This directs the Hazelcast client to use this plugin so that it finds the Hazelcast server locations by querying Kubernetes, as we don’t know the location in advance.
The two controller classes provide REST endpoints for Kubernetes to test the client is ok (MyK8SController.java) and for us to get data (MyRestController.java).
the-client : hazelcast-client.xml
This is the familiar XML file used to configure a Hazelcast client. Here we set the name for the cluster we wish to use and a property to activate statistics for the client.
The Java code amends the configuration loaded from this XML before it used.
the-client : Dockerfile
This file is used to build a Docker deployment image to deploy to a container.
It’s fairly simple, copying the output of the Maven build into the image, and specifying it as the application that the container runs.
We can push this image to a Docker container to get it to run, but we’ll get Kubernetes to do this for us.
the-server : Application.java, ApplicationConfig.java, ApplicationInitialiser.java & MyK8SController.java
This is the Java code for the server module, the main part of interest being the ApplicationConfig.java file. This configures the Hazelcast server to use the Hazelcast Kubernetes plugin to override some of the configuration from hazelcast.xml. In Kubernetes we don’t know the server locations in advance, so have to ask Kubernetes where they have been placed when each server starts.
There is a REST endpoint handled by MyK8sController. that Kubernetes uses to check this process is happy.
Finally, the ApplicationInitializer.java class injects some test data into the cluster as it starts.
the-server : hazelcast.xml
This is the usual hazelcast.xml file, that configures the cluster with the cluster name and management center location.
The ApplicationConfig.java class loads this, will extend it with the server locations from Kubernetes and override the Management Center location with the correct location from Kubernetes.
the-server : Dockerfile The file is used to build the Docker deployment image for the Hazelcast server.
It’s the same idea as for the Hazelcast client, take the Jar file produced by Maven and make that the command that the Docker container runs.
Top level : deployment.yaml
Finally, the deployment.yaml file.
This is the file that Kubernetes uses when we tell it.
In this file we specify what Docker images we want to deploy, how many of each we want, and various other things. More on this later.
Build The Example Now we need to prepare the Docker images that Kubernetes needs to deploy. These images need to go to a Docker image repository that Kubernetes can access.
Before
So the first thing to check is that you’re running the build in the right environment, the Docker repository associated with Kubernetes.
Run the docker images command again, just to be sure you’re still in the right window.
You should see some Docker images already present, much like the above, with names containing the word “kubernetes”.
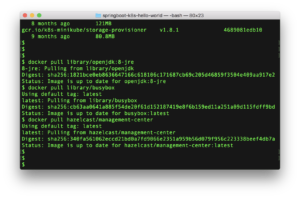
docker pull
In the same window, run these three commands.
docker pull library/openjdk:8-jre
docker pull library/busybox
docker pull hazelcast/management-center
These command will “pull” (ie. download) three existing Docker images from the Docker Hub and put them in the Docker repository associated with Kubernetes on your machine.
This may take a minute or two depending on your network speed.
If we don’t download them now, Kubernetes will fetch them when we need them. Doing it now saves time later on.
mvn install dockerfile:build
In the same window, run this command
mvn install dockerfile:build
This does the usual Maven build to create executable Jar files, but also runs the Dockerfile Maven plugin.
As you might guess, the Dockerfile Maven plugin uses the Dockerfile file as guidance to build a Docker image. This image is stored in a Docker repository.
So this builds two Docker images, one for the Hazelcast server and one for the Hazelcast client, with each image containing the relevant executable Spring Boot application Jar.
After
If all has gone well, you should now have 5 extra Docker images, the three downloaded and the two made by Maven: 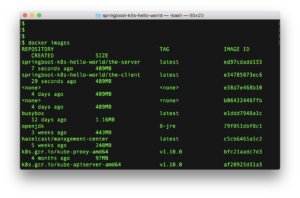
There will be other images, the images that were there when we first started the environment plus any output from Maven builds that are re-run.
Checkpoint
We’re now about to actually run the example in Kubernetes.
If any of the commands below fail, hang or time-out, that’s probably an indication your physical machine doesn’t have enough capacity to run this demo. Sorry.
Run The Example
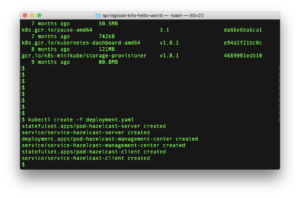
In the usual command window, run this command:
kubectl create -f deployment.yaml
That’s it!
Kubernetes does the rest.
All we do now is inspect and test, and wait quite a bit while things are handled for us.
What will happen in the background is some pods will be created for 1 Hazelcast server, 1 Hazelcast Management Center and 2 Hazelcast clients. The numbers for each are in the deployment.yaml file.
These pods will hold Docker containers that run on our only Kubernetes node (minikube) which in turn is a virtual machine provided by VirtualBox. Many layers of complication.
Hazelcast Server on Kubernetes – start
The first thing we want to see is that the Hazelcast server is ok. We have only requested one of these be run.
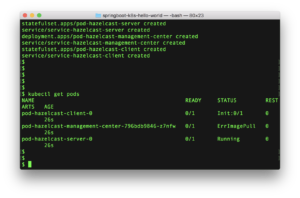
Enter this command below
kubectl get pods
This asks Kubernetes for the status of the pods. The one we are interested in here is pod-hazelcast-server-0. This name comes from the deployment.yaml file.
We’re expecting this to be starting or started, since it doesn’t depend on anything.
However being told “Running” is useful but not enough. We want to see what is happening inside.
Run this command to stream the system output logs from the pod to our screen:
kubectl logs pod-hazelcast-server-0
What we’re expecting to see is the same start-up messages we saw when we ran the Hazelcast server outside Kubernetes earlier, culminating in the message that 5 test data records have been loaded to the “hello” map.
What we should also see is multiple lines being logged by the MyK8sController.java. We have configured Kubernetes to test the Hazelcast server’s REST endpoint every few seconds to see if it is available.
Hazelcast Management Center on Kubernetes – start & use
The next thing we want to do is access the Hazelcast Management Center, to monitor our cluster.
Again we can access the Management Center’s logs (the command would be kubectl logs and the pod name), but that’s not particularly useful. Management Center is a web application, we wish to access it from a browser.
However, the browser is on our computer, outside of Kubernetes control. The Management Center is inside the Kubernetes cluster.
Section 4 of the deployment.yaml file exposes the Management Center pod as to HTTP traffic. All we need do is find out the pod’s location.
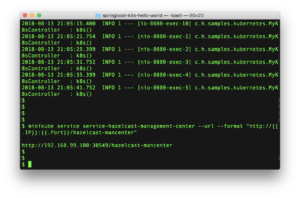
Use this command to ask Minikube for the routing to the Kubernetes service that fronts the Management Center pod.
minikube service service-hazelcast-management-center --url --format "http://{{.IP}}:{{.Port}}/hazelcast-mancenter"
Now we know the Management Center’s web address.
In the screenshot above it is host 192.168.99.100 port 30549.
The output of the Minikube service query is the full URL to paste into a browser to get access to the Management Center.
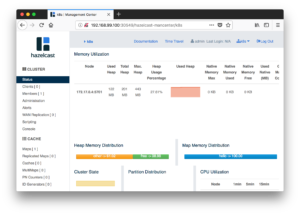
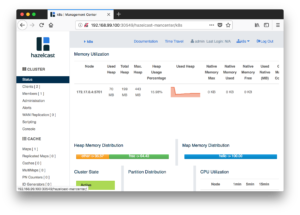
When you do this, you’ll be the first person to log into that Management Center instance, so will need to set up a logon and password for the “admin” user. Once done you can log in and should see something like the below.
The only server in the “k8s” cluster is monitored by that Management Center.
Hazelcast Client on Kubernetes – start
Now we turn out attention to the Hazelcast clients. In the deployment.yaml file we asked for two of these to run.
Again, we need to see what state the Kubernetes pods holding Docker containers running Hazelcast clients are actually in. So try this:
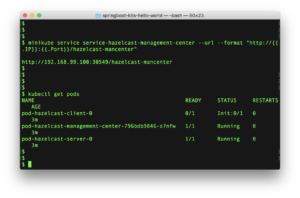
kubectl get pods
We have asked in the deployment.yaml file for two pods to be run for clients and these will be named pod-hazelcast-client-0 for the first and pod-hazelcast-client-1 for the second.
Depending how quickly you run this command, you should see one of three things.
The first pod is initializing and the second isn’t present. The first pod is running and the second pod is initializing. Or both pods are running. Kubernetes starts one after the other, so at some point the pod status will be each of these three options.
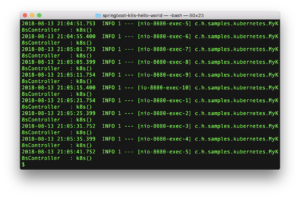
Assuming the first pod is running, you can use this command to look at it’s logs kubectl logs pod-hazelcast-client-0 and get output like the below: 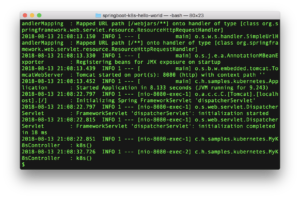
What the above screenshot shows is the usual Spring Boot start-up messages. At some point in this list you’ll see a web server started on port 8080.
Thereafter Kubernetes will test the “/k8s” URL every few seconds to check the container is good, and we’ll see this logged by the MyK8sController class
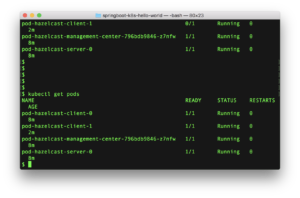
Now try the same command to inspect the logs of the 2nd pod (so kubectl logs pod-hazelcast-client-1).
In this screenshot, we try to see the 2nd pods logs while it is still initializing and we get rejected. It’s safe enough to keep trying this until the pod is up. 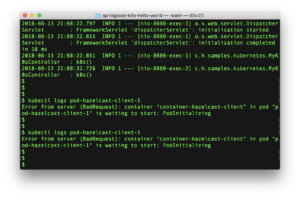
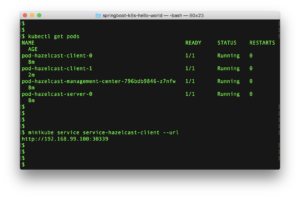
Finally the kubectl get pods command will show all four pods we need are up and running.
Hazelcast Client on Kubernetes – use
Now that the clients are up and running, we can actually use them.
What we have done in the deployment.yaml file, step 6, is to put a load balancer in front of the client’s REST interface.
So there are 2 Hazelcast clients but 1 URL that alternates traffic accross them.
Use this command to find out the address of the load balancer:
minikube service service-hazelcast-client --url
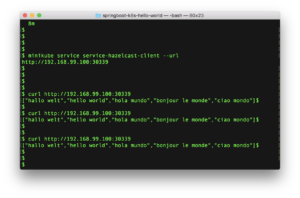
In the example below the load balancer has been placed on 192.168.99.100 port 30339. It might not that for you.
Now we can try the curl command a few times against the load balancer. Here we try it three times and get the usual “Hello World” output.
Now try kubectl logs pod-hazelcast-client-0 and/or kubectl logs pod-hazelcast-client-1.
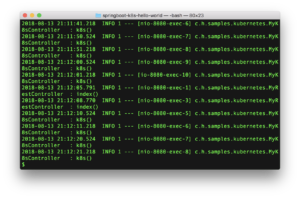
What we see in the below output from one of the pods is that the “index()” method in MyRestController has been invoked twice. There are still lots of lines as Kubernetes is polling the “/k8s” URL too, but it’s there if you look closely (and easier to find if you turn off logging for the “/k8s” call).
So we called the load balancer 3 times, and saw the REST URL output from one client 2 times. So the load balancer sent the other call to the other client.
Finally, if you go back the Hazelcast management center, you should now see two clients connected.
Remember, clients don’t show by default. These ones are visible as we’ve set hazelcast.client.statistics.enabled to “true” in the client’s hazelcast-client.xml file.
Explaining the deployment.yaml file
All the magic happens in the deployment.yaml file, which acts as a command script that the kubectl program executes.
Actually, this file contains 6 commands in sequence, that kubectl will execute.
Three dashes (---) are used to separate the 6 commands so we can put them in the one file. 6 files is possible to, and as we will see might be a better idea.
So what do the 6 sections do ?
pod-hazelcast-server
This first section creates a Kubernetes pod.
There is There is only one pod created by this section, as we have specified:
replicas: 1
The pod contains this image, built earlier by Maven and found in the Docker image repository:
image: "springboot-k8s-hello-world/the-server"
Finally, we specify a URL that Kubernetes can use to test the pod for it being useable.
livenessProbe:
  httpGet:
    path: /k8s
This is of course the REST endpoint “/k8s” that the MyK8SController class implements.
service-hazelcast-server
This second section creates a “service” in Kubernetes, named “service-hazelcast-server”.
It uses this statement for the service to include the Hazelcast server pods:
selector:
  app: pod-hazelcast-server
This service is a collection that allows us to group a number of pods. Specifically, only Hazelcast server pods, and as per the first section only one of these Hazelcast server pods is started.
Kubernetes will probably be in the middle of the Hazelcast server pod starting when this second action is executed, but that’s ok. We can bind the service and the pod together even if the pod isn’t yet useable.
pod-hazelcast-management-center
The third section starts another single pod for the Hazelcast management center.
This is a similar idea to the pod specification for the Hazelcast server. We request one pod (replicas: 1) and specify the image from the Docker repository (image: hazelcast/management-center).
One difference though is the image hazelcast/management-center isn’t one we build ourselves. It’s built by Hazelcast, and in earlier setup we’d requested the `docker pull hazelcast/management-center to download it.
If you want to look, you can find this image on the public Docker hub here.
Again, Kubernetes will action this request while it’s doing the first two, which is fine. The Hazelcast server can start before the Hazelcast management center, or vice versa.
service-hazelcast-management-center
Command 4 is similar to command 2, we ask for a service name to be bound to the pod created by the proceeding command.
So the service name “service-hazelcast-management-center” is bound to the “pod-hazelcast-management-center” pod.
Finally we specify this,
type: NodePort
This opens a node and port on the service that connects to the pod. In other words, this exposes the pod’s HTTP interface to the outside world, so we can log into the Hazelcast management center.
Again, this command will run in parallel while the Hazelcast management center is starting, so any attempt to log in while it’s starting won’t be particularly successful. Since we’ve alrady downloaded the Hazelcast management center Docker image, there shouldn’t be any waiting for it to start so this shouldn’t really be a problem.
Remember, much earlier we used the minikube service command to find the actual node and port for this service.
pod-hazelcast-client
Command five starts 2 pods for Hazelcast clients, as it has this:
replicas: 2
Mostly, the specification is pretty much the same as we’ve seen before. There’s an Docker image name to run (springboot-k8s-hello-world/the-client) and a URL for Kubernetes to check the pod is ok.
What is different here is this section:
initContainers:
    name: wait-for-pod-hazelcast-server
    image: busybox
    command: ['sh', '-c', 'sleep 120']
We don’t want Kubernetes to start the pod containing the Hazelcast client (command section 5) until the pod containing the Hazelcast server (command section 1) is ready.
So we use the initContainers section to specify what initialisation actions to do prior to starting the pod.
There are a number of ways to achieve this. Here we go for a naive method, we wait for 120 seconds.
There are certainly better ways to do this, but not simpler.
For example, you could test the Hazelcast server’s “/k8s” URL.
Or you could split the deployment.yaml file into two. Run steps 1 to 4 with one command, manually verify everything is ready, and then run steps 5 & 6 with another command.
service-hazelcast-client
The sixth and last command binds a service named “service-hazelcast-client” to any pod with the name “pod-hazelcast-client“.
There will be two such pods, so this service name acts as a collection for the two pods.
Finally, the service has this:
type: LoadBalancer
The service is implemented as a load balancer, so will alternate incoming requests across the pods.
Again we need to use the minikube service command to find the external IP address for this load balancer so we can send HTTP traffic to it.
Tidy Up
In the usual command window, run this command:
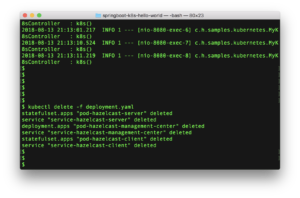
kubectl delete -f deployment.yaml
This directs Kubernetes to remove the items that it added when running the kubectl create -f deployment.yaml. The file lists what to create, so therefore what was created and should be deleted.
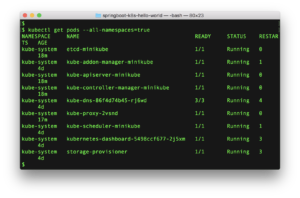
Just to be sure try:
kubectl get pods --all-namespaces=true
The pods created (one Hazelcast server, one Hazelcast management center, two Hazelcast clients) will be shut down. Depending when you run this you might see them with status “Terminating” indicating they are shutting down, or perhaps completely gone. Retry this command until all these four pods are gone.
The extra option here --all-namespaces=true directs the get pods command to list the system pods, so you can see the parts that Kubernetes uses itself.
Tidy-Up 2
All the pods and containers we have added have now been deleted. However, Minikube and Docker are still running, consuming resources on your machine.
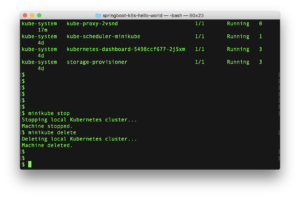
Use
minikube stop
minikube delete
to shutdown Minikube.
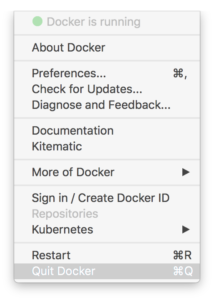
Docker shutdown
On a Mac, Docker runs as a daemon process. Stop it using the menu on command bar.
Variations If all has gone well on the above demo, you can always repeat it but vary the number of Hazelcast server or Hazelcast clients that you want. Just amend the deployment.yaml file in the obvious places, or see the comments in it.
Summary
Hazelcast works without Kubernetes, Hazelcast works with Kubernetes.
If you’re using Docker for containerization, you’ll find Kubernetes the next sensible step.
What this example has tried to show is the detail involved. Most of the time you won’t care for the detail, so something like Helm might be the next step to simplify deployment.
You may wish to de-activate or uninstall any services installed to run this demo (such as Docker), if you’re not going to use them again.

