
By Enes Akar
Co-founder & CTO, Hazelcast Cloud
Enes was one of the early developers of Hazelcast. He joined the company in 2011 with a passion for making distributed computing incredible simple. From 2012 to 2017, he headed the engineering team as VP of Engineering. Since 2017, he has led the development of Hazelcast Cloud, which is enterprise-grade Hazelcast software as a fully managed service in the cloud. Prior to joining Hazelcast, Enes worked in software development and software engineering at telecommunications companies, including Alcatel-Lucent and Ericsson. He holds a Bachelor of Science in Computer Engineering and an MBA from Bogazici University, Istanbul.
View all blogs by the authorAug 8, 2019
Auto-Scaling Clusters with Hazelcast Cloud
As cloud technologies evolve, applications require less human intervention and maintenance. “Serverless” is a term that implies that users should have nothing to do with servers. The most exciting claim of serverless functions is that they scale automatically as the user base and load grows. Moreover, when there is no user activity, there will be no server or resource usage. But, serverless functions are not always the best solution. Many use cases require servers, such as web applications, databases, queues, etc. When you need servers, cloud instances, and VMs in your architecture, then auto-scaling technologies will be beneficial. Auto-scaling enables a cluster to scale up and down depending on the load and usage rate of resources. You benefit from auto-scaling in two areas:
- Better availability and service quality: Auto-scaling prevents outages and performance drops in case of a demand spike by increasing the resources and capacity of clusters.
- Low cost: When the demand is low, auto-scaling decreases the size of the cluster. That means you do not pay more than you need when the demand is low.
In this instance, Hazelcast Cloud can act as a “Backend-as-a-Service” (BaaS). Under this approach, Hazelcast will maintain the clusters for you to provide a simplified experience without dealing with servers. Since auto-scaling is a critical component of Hazelcast Cloud, it can be used to scale your cluster without any human intervention.
Auto-Scaling Algorithm
Implementing auto-scaling for Hazelcast is straightforward. To grow a Hazelcast cluster, you need to add one more Hazelcast instance to the same network with the same credentials. The new node discovers and joins the cluster automatically. To shrink a cluster, terminate or shut down a node, and it will detect the dead node resulting in the partitions adjusting accordingly. Because multiple replicas of each partition are retained, no data is lost.
As scaling up and down with Hazelcast is quite easy, the only challenging part is to decide when to scale the cluster. The most popular use cases of Hazelcast are caching and data stores. For these use cases, memory is the primary resource that needs to be scaled, so we need auto-scaled, cloud-based Hazelcast clusters. Although the default metric used by Kubernetes’ horizontal autoscaler is CPU, we could customize it to check memory utilization instead of CPU. Unfortunately, this is not so simple. Hazelcast Cloud keeps user data in High-Density Memory Store (off-heap memory). Hazelcast reserves the off-heap memory beforehand, so the operating system can’t report what percentage of the cluster is free. Only Hazelcast knows how much data is being kept. To help, Hazelcast wrote an auto-scaling microservice that checks the actual memory utilization of the Hazelcast cluster and decides whether to scale. We call this microservice an “autoscaler.” As a simple algorithm, the Hazelcast autoscaler chooses to scale up (add one more node) when memory utilization is over 80%. When memory utilization drops below 40%, the autoscaler scales down the cluster by shutting down one node. To mitigate the side effects of repartitioning, the autoscaler sleeps for 1 minute after a scaling event. This means multiple-scale operations can take place with one-minute intervals between each.
The above algorithm looks too simple, but we prefer it over more complicated algorithms because we do not expect rapid increases in memory utilization. The 40-80% rule works for most of the use cases and cluster types of Hazelcast Cloud. In the future, as more sophisticated use cases and requirements are experienced, Hazelcast will improve its auto-scaling algorithm, including potentially allowing users to adjust when and how to scale.
Auto-Scaling in Action
Let’s see how auto-scaling works step by step.
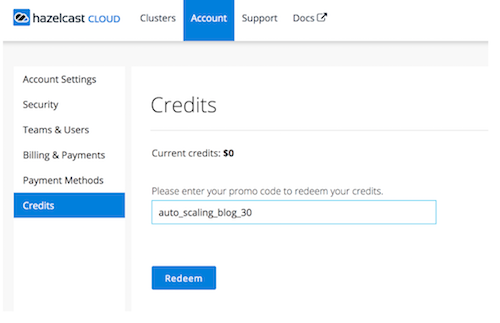
Step 1: Hazelcast Cloud Account – Hazelcast Cloud has a free tier. You can register for free without a credit card and start using Hazelcast clusters in for free with some restrictions. For example, the memory of a free cluster is fixed, so auto-scaling is not possible in the free tier. But don’t worry! To help you try auto-scaling, you can use the following code to get a $30 credit for free: auto_scaling_blog_30
If you don’t have one already, create a Hazelcast Cloud account here. After confirming your email and login, go to Account >> Credits page and enter the promo code “auto_scaling_blog_30″ as below:
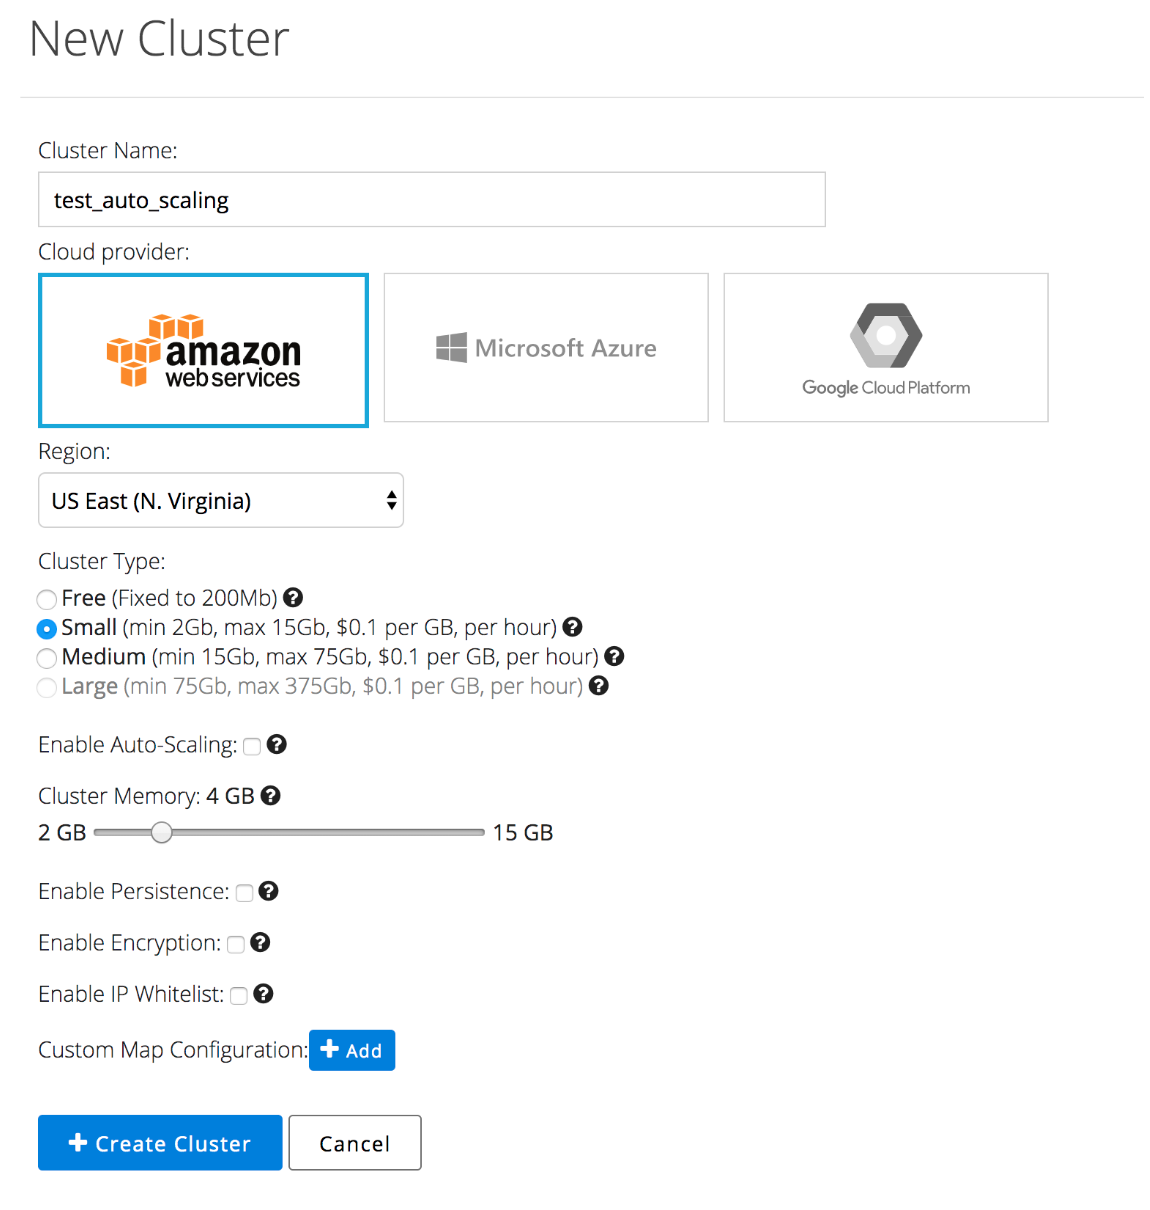
Step 2: Creating a Cluster – Now that you have $30 in credits, you have access to the full functionality of Hazelcast Cloud. To start, create a cluster with 4GB memory without enabling auto-scaling, as shown below:
Step 3: Insert Data – Now, you should have an active cluster with 4GB memory capacity, but empty. To insert data, click on “Configure Client” and follow the procedure for your preferred language. You will need to download the zip file and run the specified command in the same folder. The example below ran the sample Java client, which produced output similar to this:
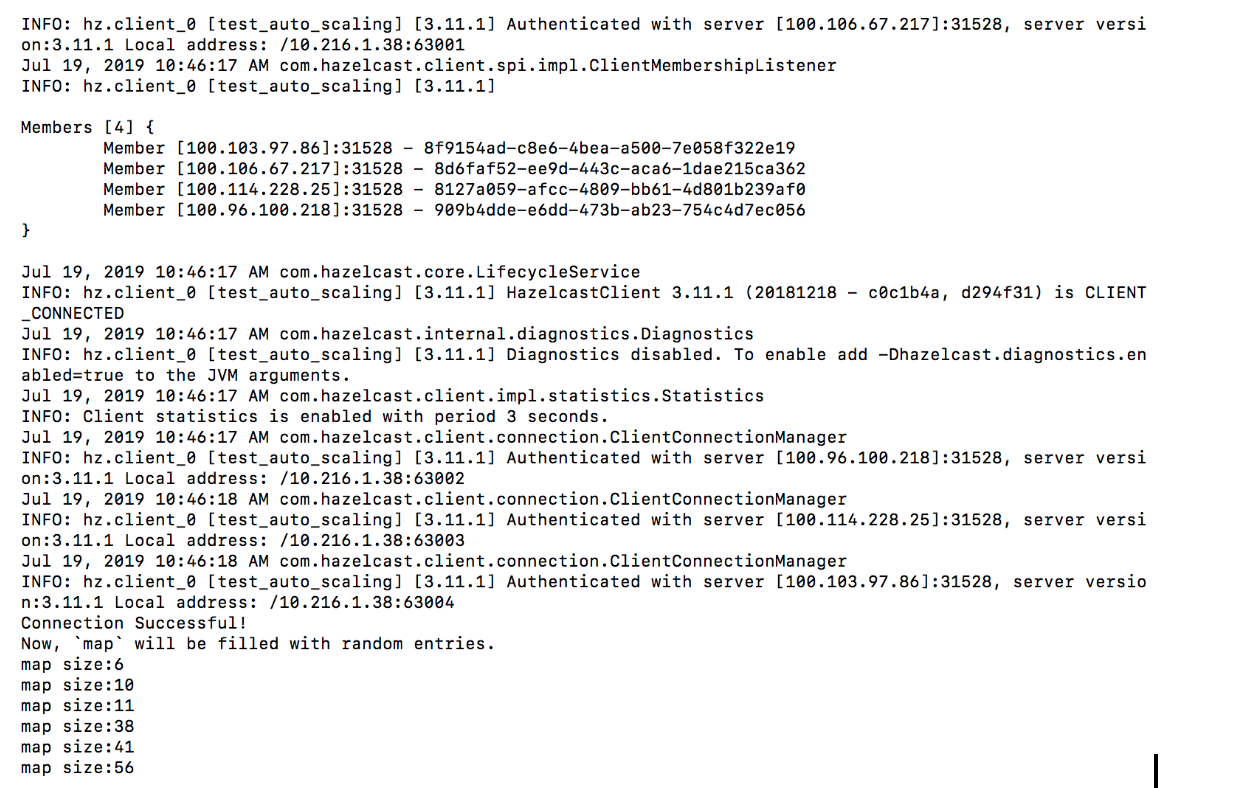
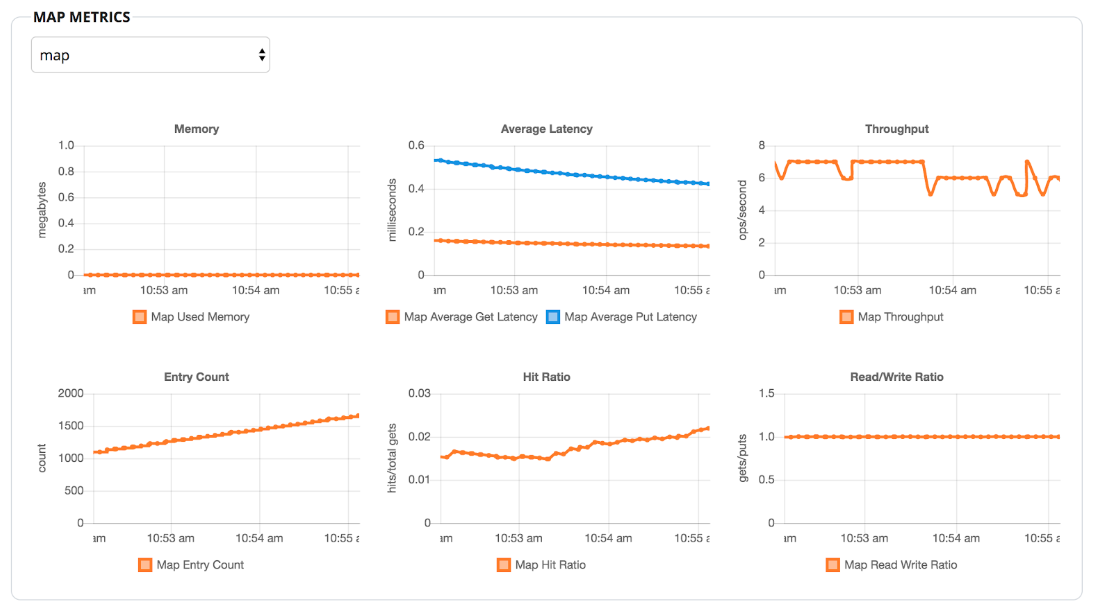
As you see from the logs above, Hazelcast Cloud created a 4-node, 4GB cluster. Run the client to start inserting entries to a map, and you will see some statistics in the dashboard, similar to the metrics below:
Step 4: Enable Auto-Scaling – We began to add data, but still, the data size is quite small. I waited a few minutes because the entries that the client inserts are too small; yet, the cluster is almost empty. So 4GB is more than we need. Let’s enable auto-scaling by clicking on “Manage Memory,” and we should see Hazelcast Cloud scale down.
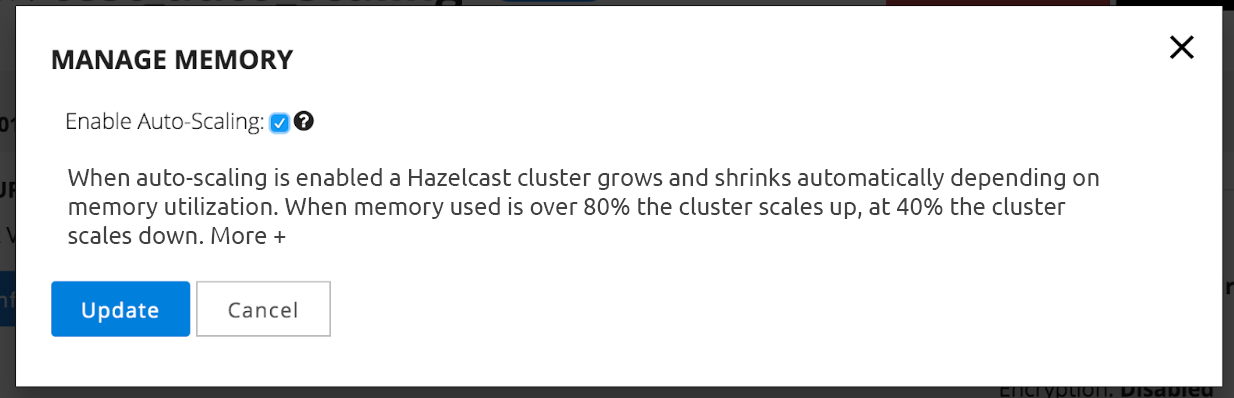
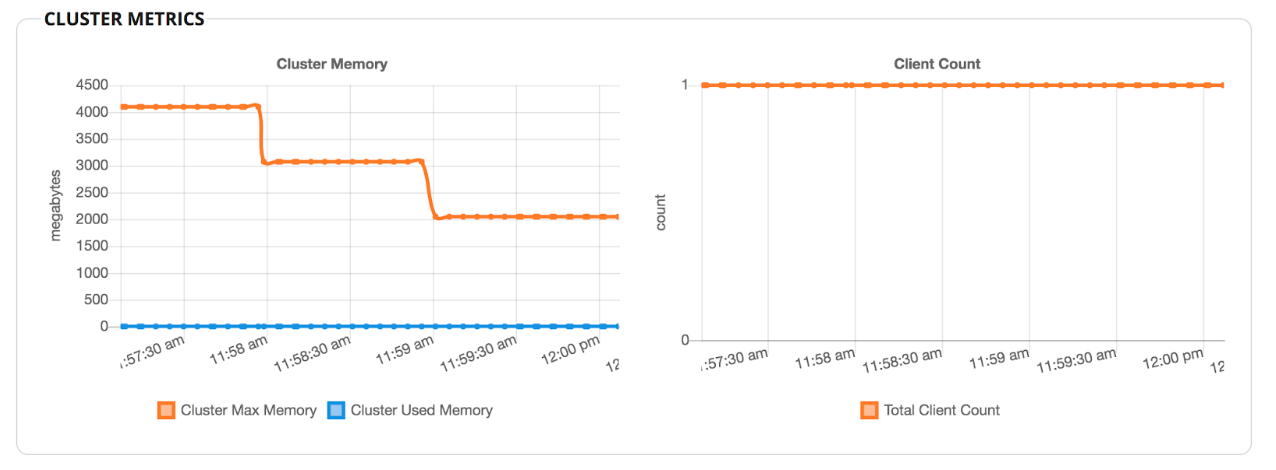
After clicking on “Update,” your cluster should scale down to 2GB step by step. First, it scales down to 3GB. In one minute, it rechecks the memory and scales down to 2GB. The minimum size of a small type cluster is 2GB; that’s why it does not attempt to scale down further.
Step 5: Insert More Data – We have tried scaling down. Now, let’s try scaling up. Our client example is very lazy, so we need to edit its code to put in larger objects at an accelerated pace. Here’s the updated code:
Random random = new Random();
       int THREAD_COUNT = 10;
       int VALUE_SIZE = 1_000_000;
       ExecutorService es = Executors.newFixedThreadPool(THREAD_COUNT);
       for (int i = 0; i < THREAD_COUNT; i++) {
           es.submit(new Runnable() {
               public void run() {
                   while (true) {
                       int randomKey = (int) random.nextInt(1000_000_000);
                       map.put("key" + randomKey, new String(new byte[VALUE_SIZE]));
                       // map.get("key" + random.nextInt(100_000));
                       if(randomKey % 10 == 0 ) {
                           System.out.println("map size:" + map.size());
                       }
                   }
               }
           });
       }
Here are the changes I have made to increase insertion rate:
- Converted the insertion code to multithreaded (10 threads)
- Increased the value size to 1MB.
- Commented the get operation.
- Increased the range of keys to 1 million.
Then I started two clients. After waiting for a few minutes, you will see something similar to this:
As you can see, the cluster scaled up to 3GB when the data size exceeded 1.6GB.
If you are anxious to see results quicker, you can create more clients or increase the number of threads for the insertion rate. The best way to maximize the throughput is to run the clients inside the same region with the Hazelcast cluster. When you run the client from your laptop, the network latency between your laptop and AWS instances becomes the bottleneck.
What’s Next
We have explained and experimented with the auto-scaling capability. This is the initial version, so we are working on improving auto-scaling via the following methods:
- Support metrics other than memory, such as CPU and requests per second for triggering auto-scaling
- Support user-defined metrics to trigger auto-scaling
- Allow users to define the percentages to trigger auto-scaling